Account & teams
Organizations & workspaces
Last updated: July 18, 2026
CertSeal keeps your work organized in two layers: an organization that owns your plan and certificate quota, and workspaces that keep batches, designs, and access separate for different teams or clients.
CertSeal has two layers above your content: an organization and one or more workspaces. Understanding the difference makes it easy to invite teammates, keep clients apart, and control who can do what.
- An organization is your billing home. It owns your subscription and your shared certificate quota, and it holds the people who can sign in.
- A workspace is a self-contained area for your batches, certificate designs, email templates, API keys, and other content. Every organization has at least one workspace, and you can add more to keep teams, brands, or clients separate.
- Your content — batches, designs, recipients, and templates — always lives inside a workspace.
When you sign up, CertSeal automatically creates a personal organization for you, on the free plan, with a default workspace — so you always have a billing home and somewhere to work, even as a solo user. Teams grow from there by inviting people.
Roles and access
Access in CertSeal works on two levels: your role in the organization and, for regular members, an explicit access grant on each workspace.
Organization roles decide what you can do across the whole organization:
- Owner — full control, including billing, managing members, transferring ownership, and reaching every workspace.
- Admin — can invite and manage members, create workspaces, set access, and reach every workspace, but with the same billing access as an owner.
- Member — can only see and use the workspaces they’ve explicitly been given access to.
Owners and admins automatically have access to every workspace in the organization and can always edit. Members see only the workspaces they’ve been granted, and their workspace access decides what they can do there:
- Editor — can read and make changes (create batches, upload recipients, edit designs, send certificates).
- Viewer — read-only access; they can look but not change anything.
Switching organizations and workspaces
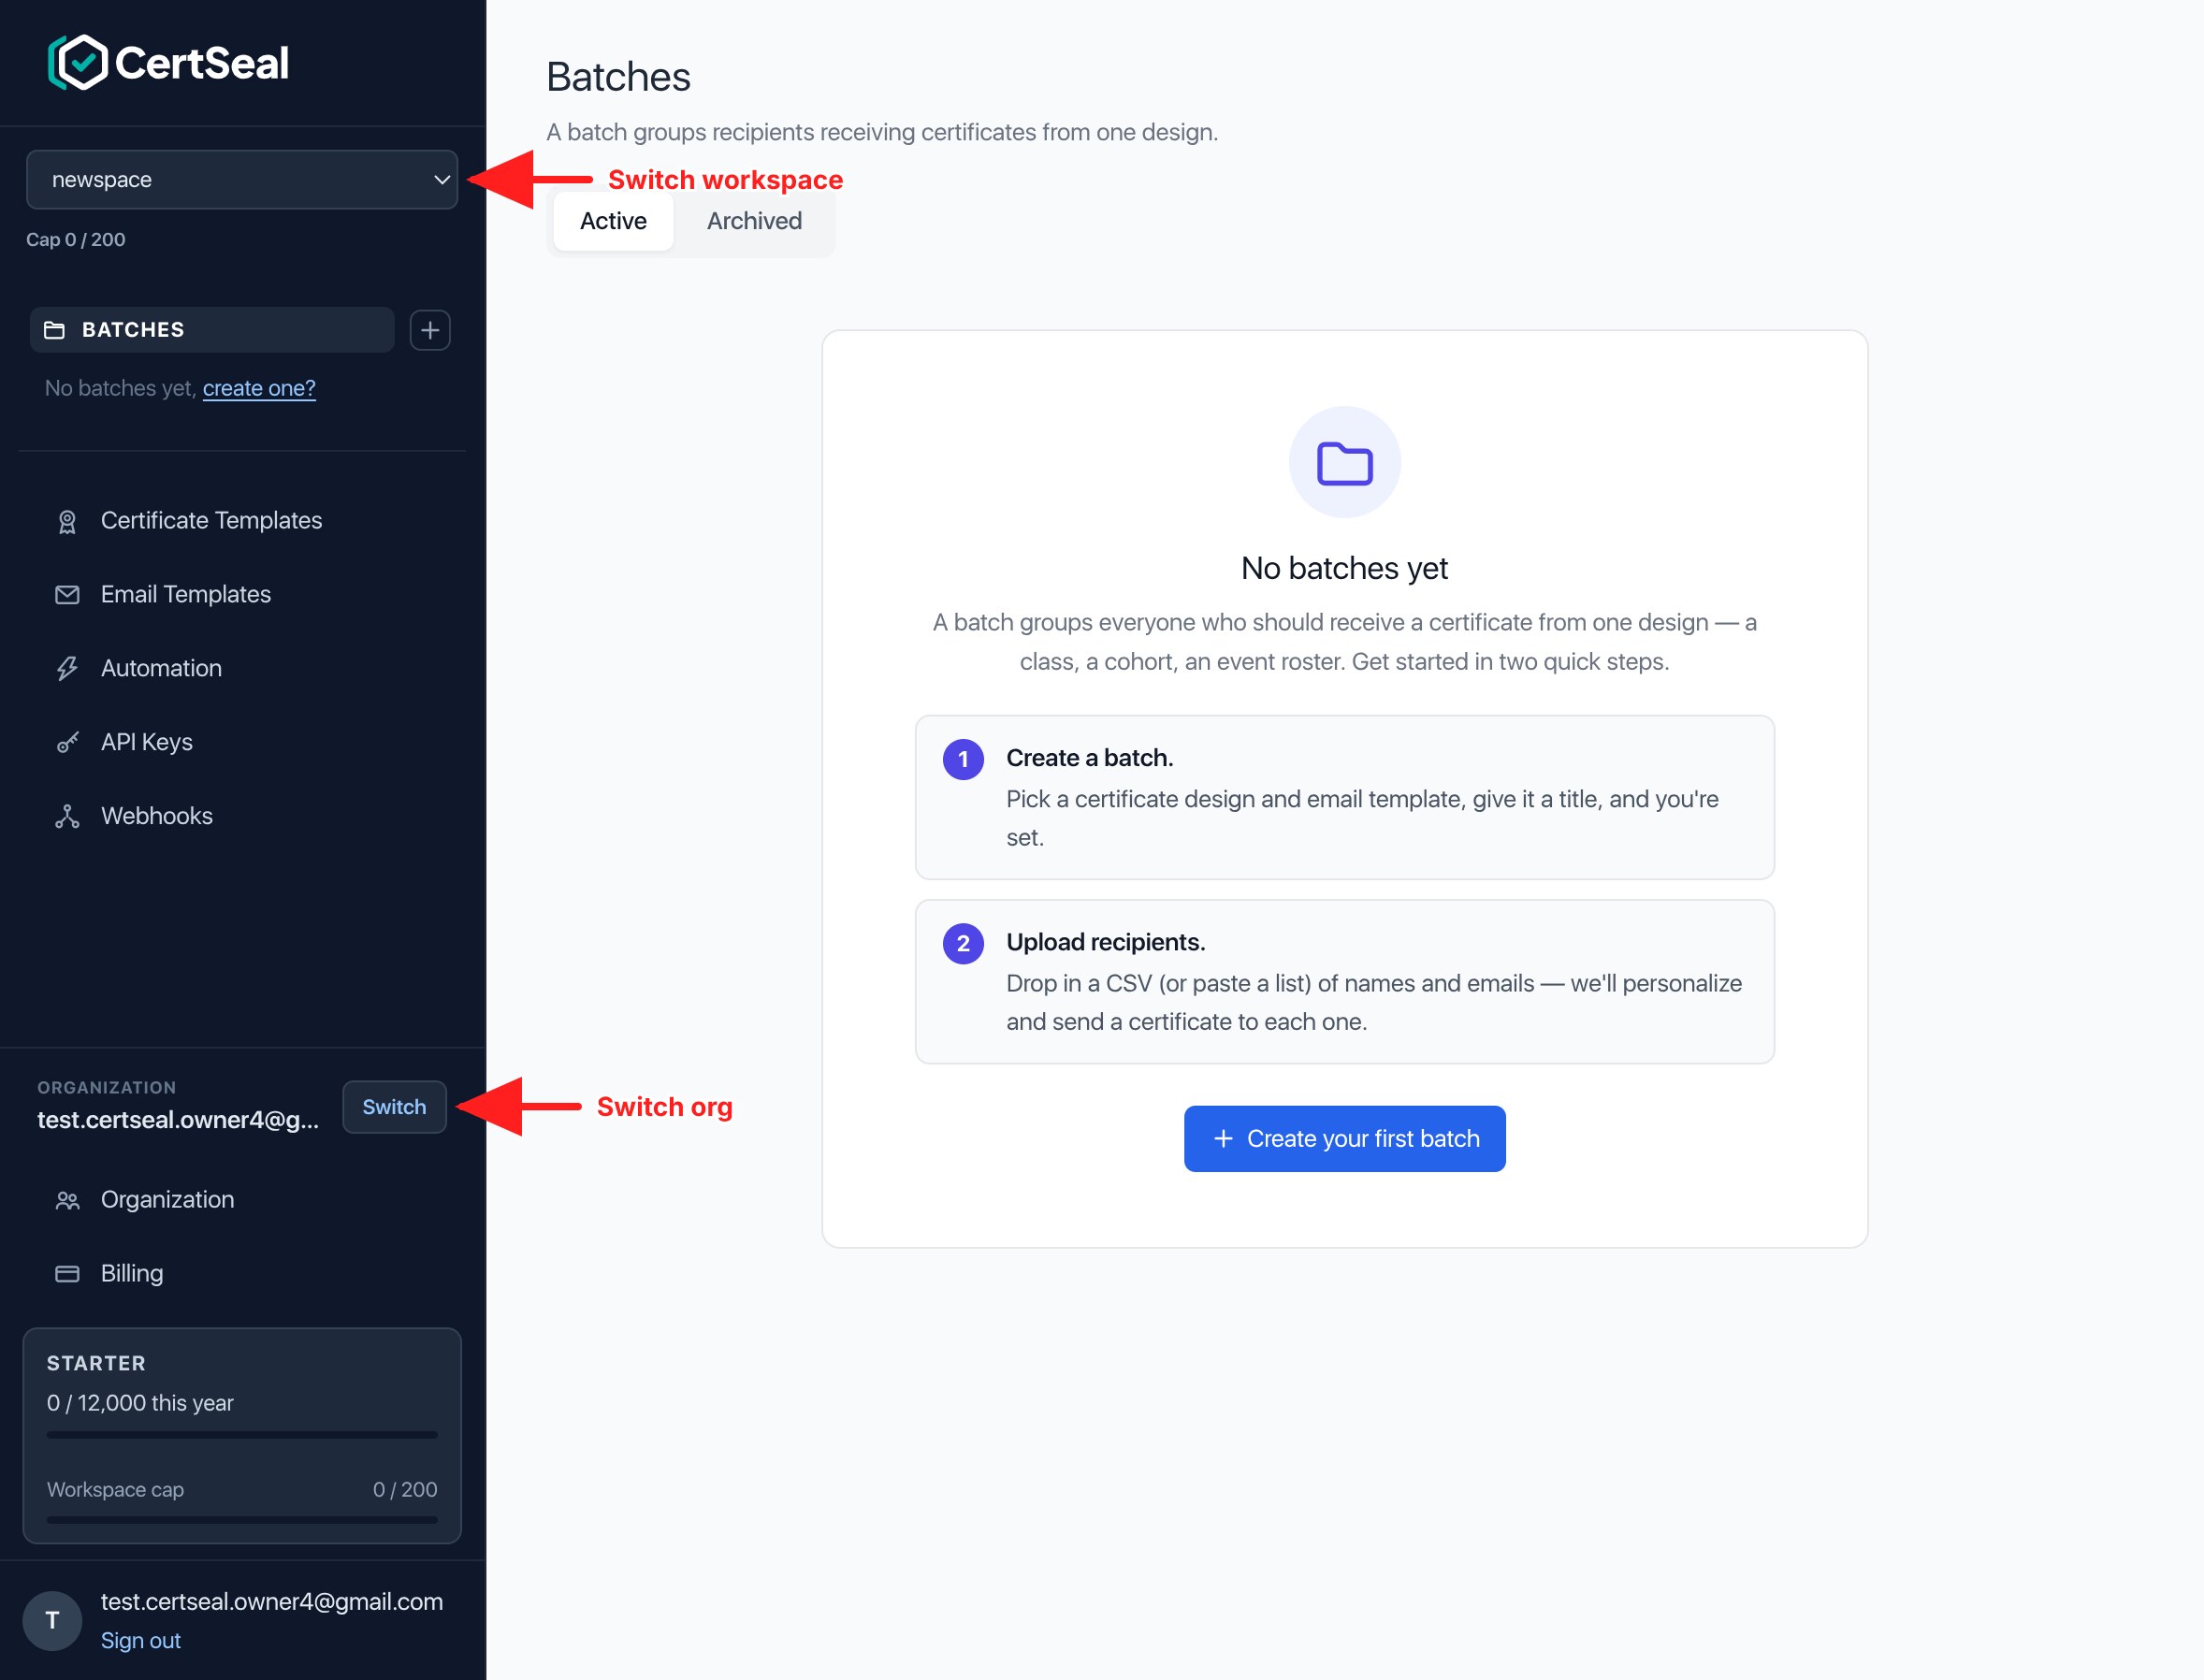
You can belong to more than one organization — for example, your personal one and a team you were invited to. The current organization and workspace are shown in the left sidebar.
- To change workspace, use the dropdown at the top of the sidebar (it appears when the organization has more than one workspace). Viewer-only workspaces are labelled
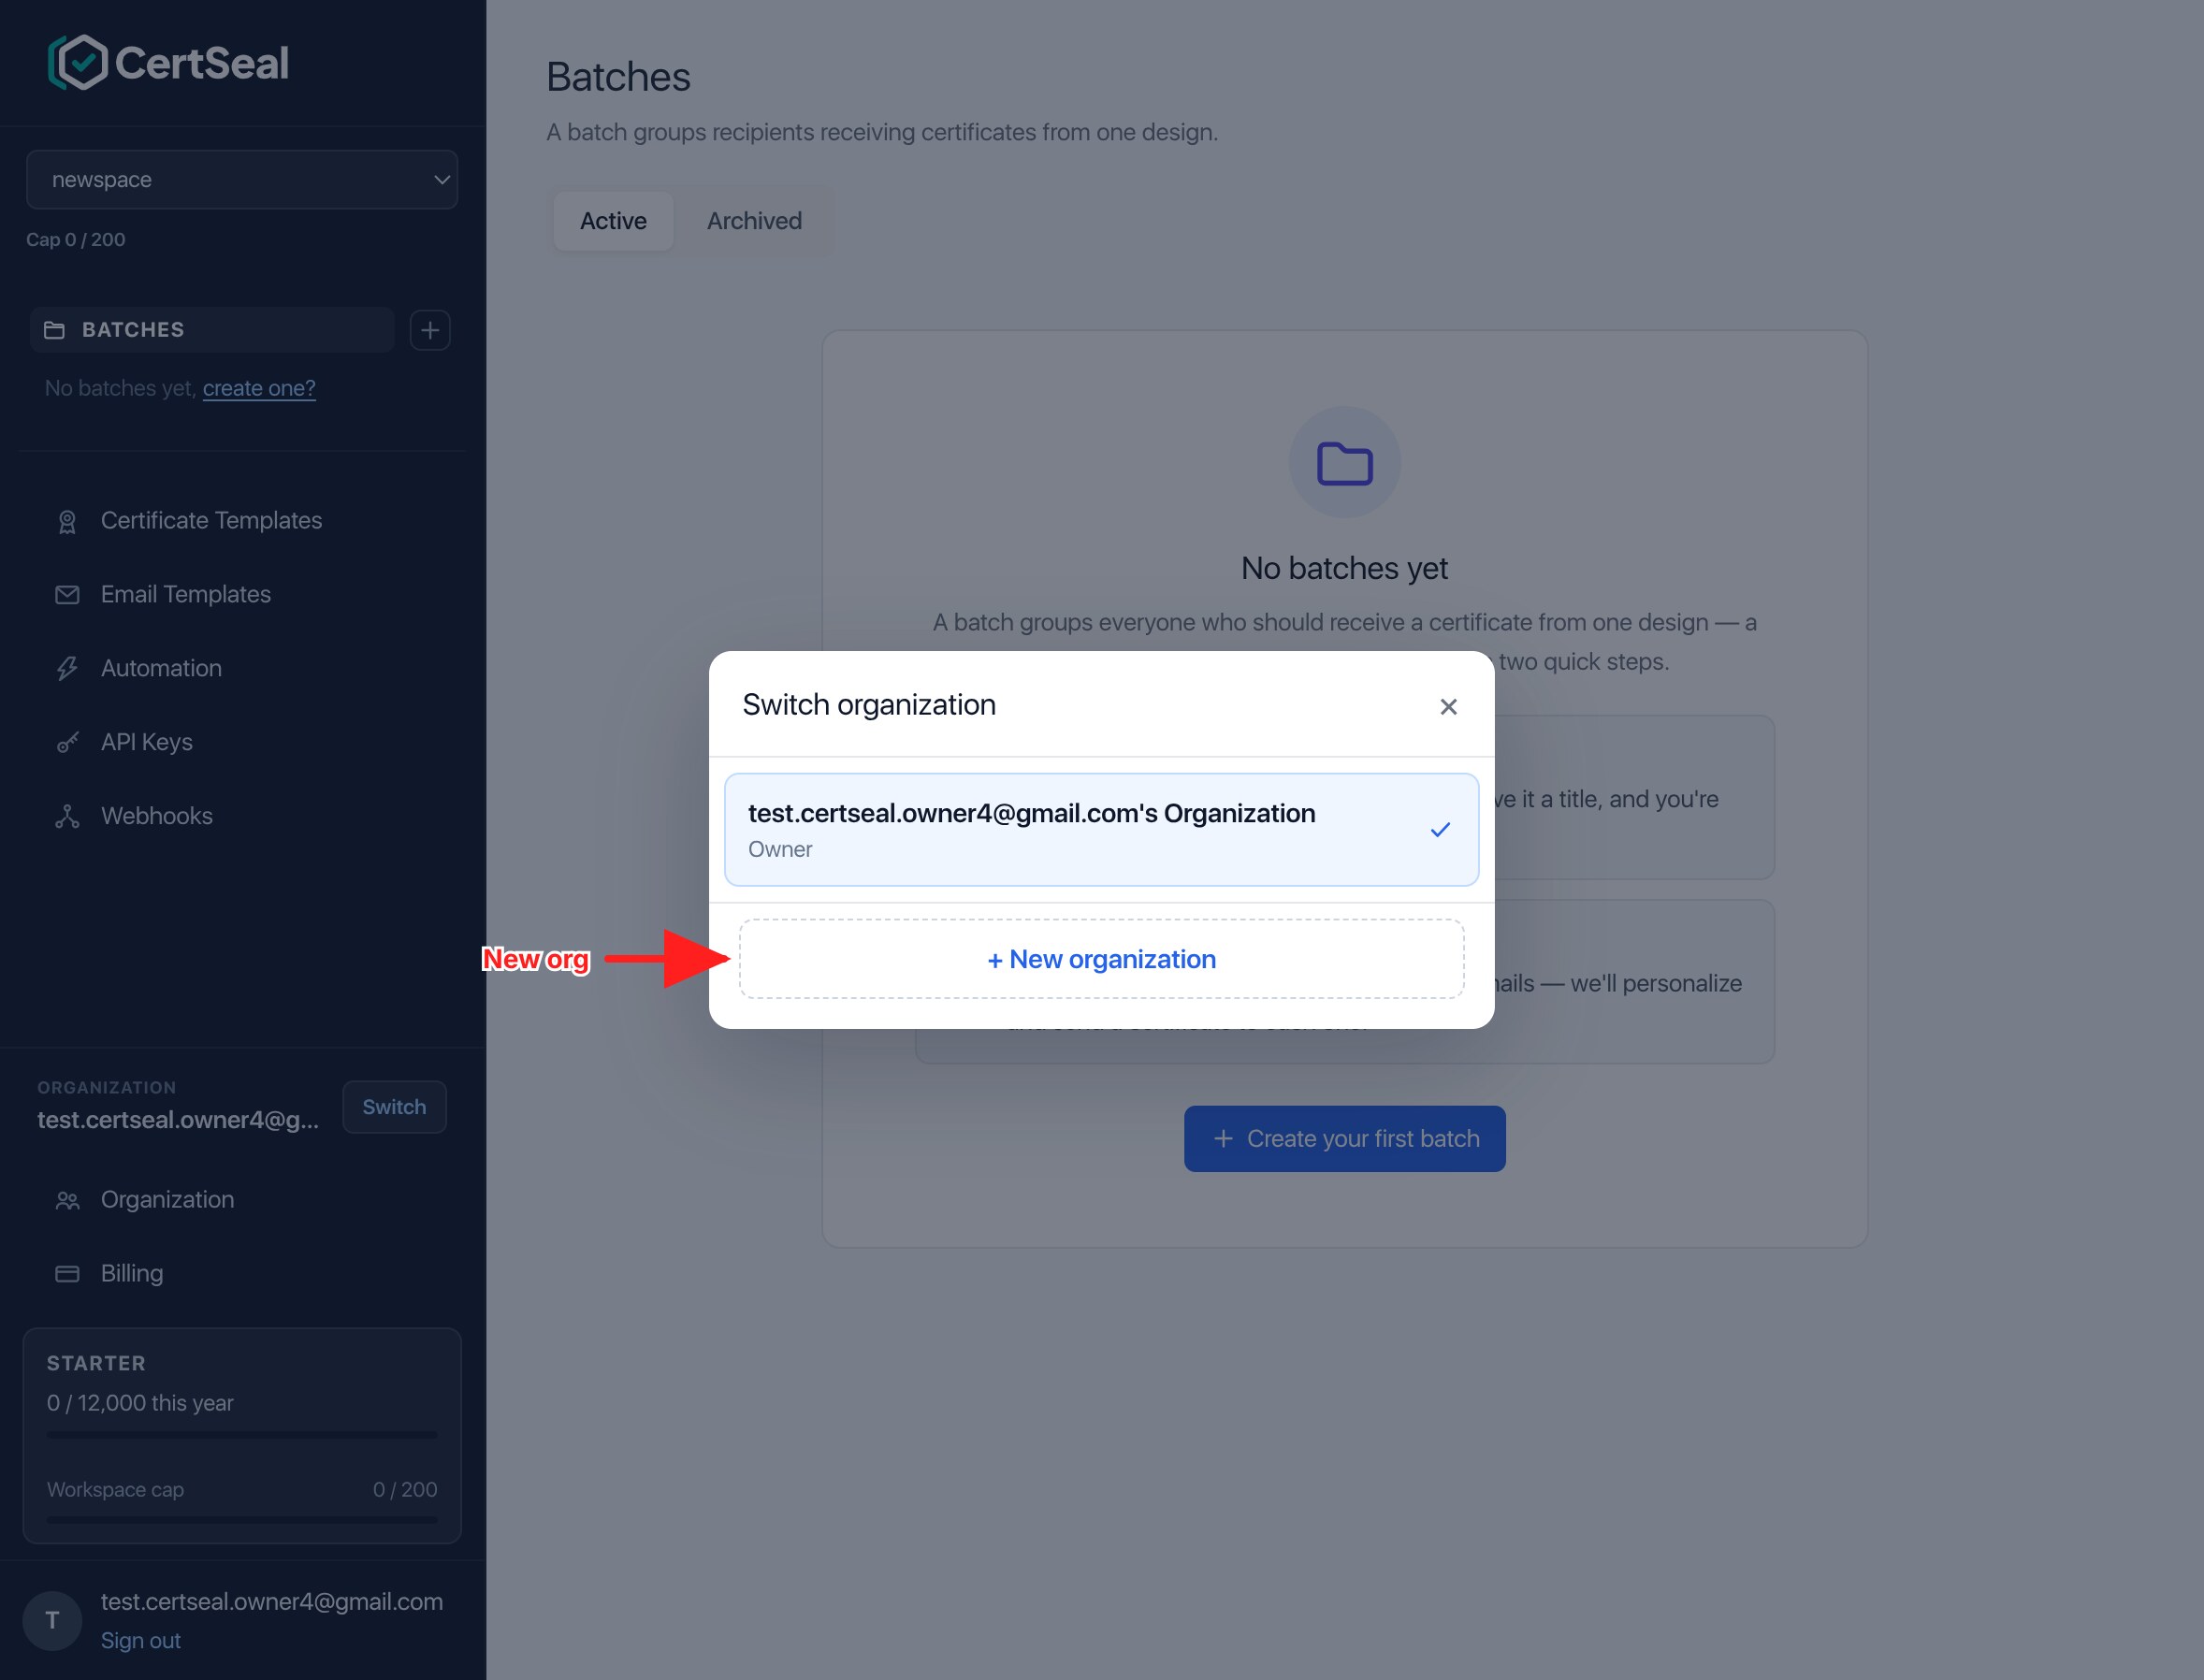
(viewer). - To change organization, click Switch in the sidebar’s Organization block and pick another organization — or create a new one from the same dialog.
Managing members
Owners and admins manage people from the Organization page (open Organization in the sidebar — it’s only visible to owners and admins).
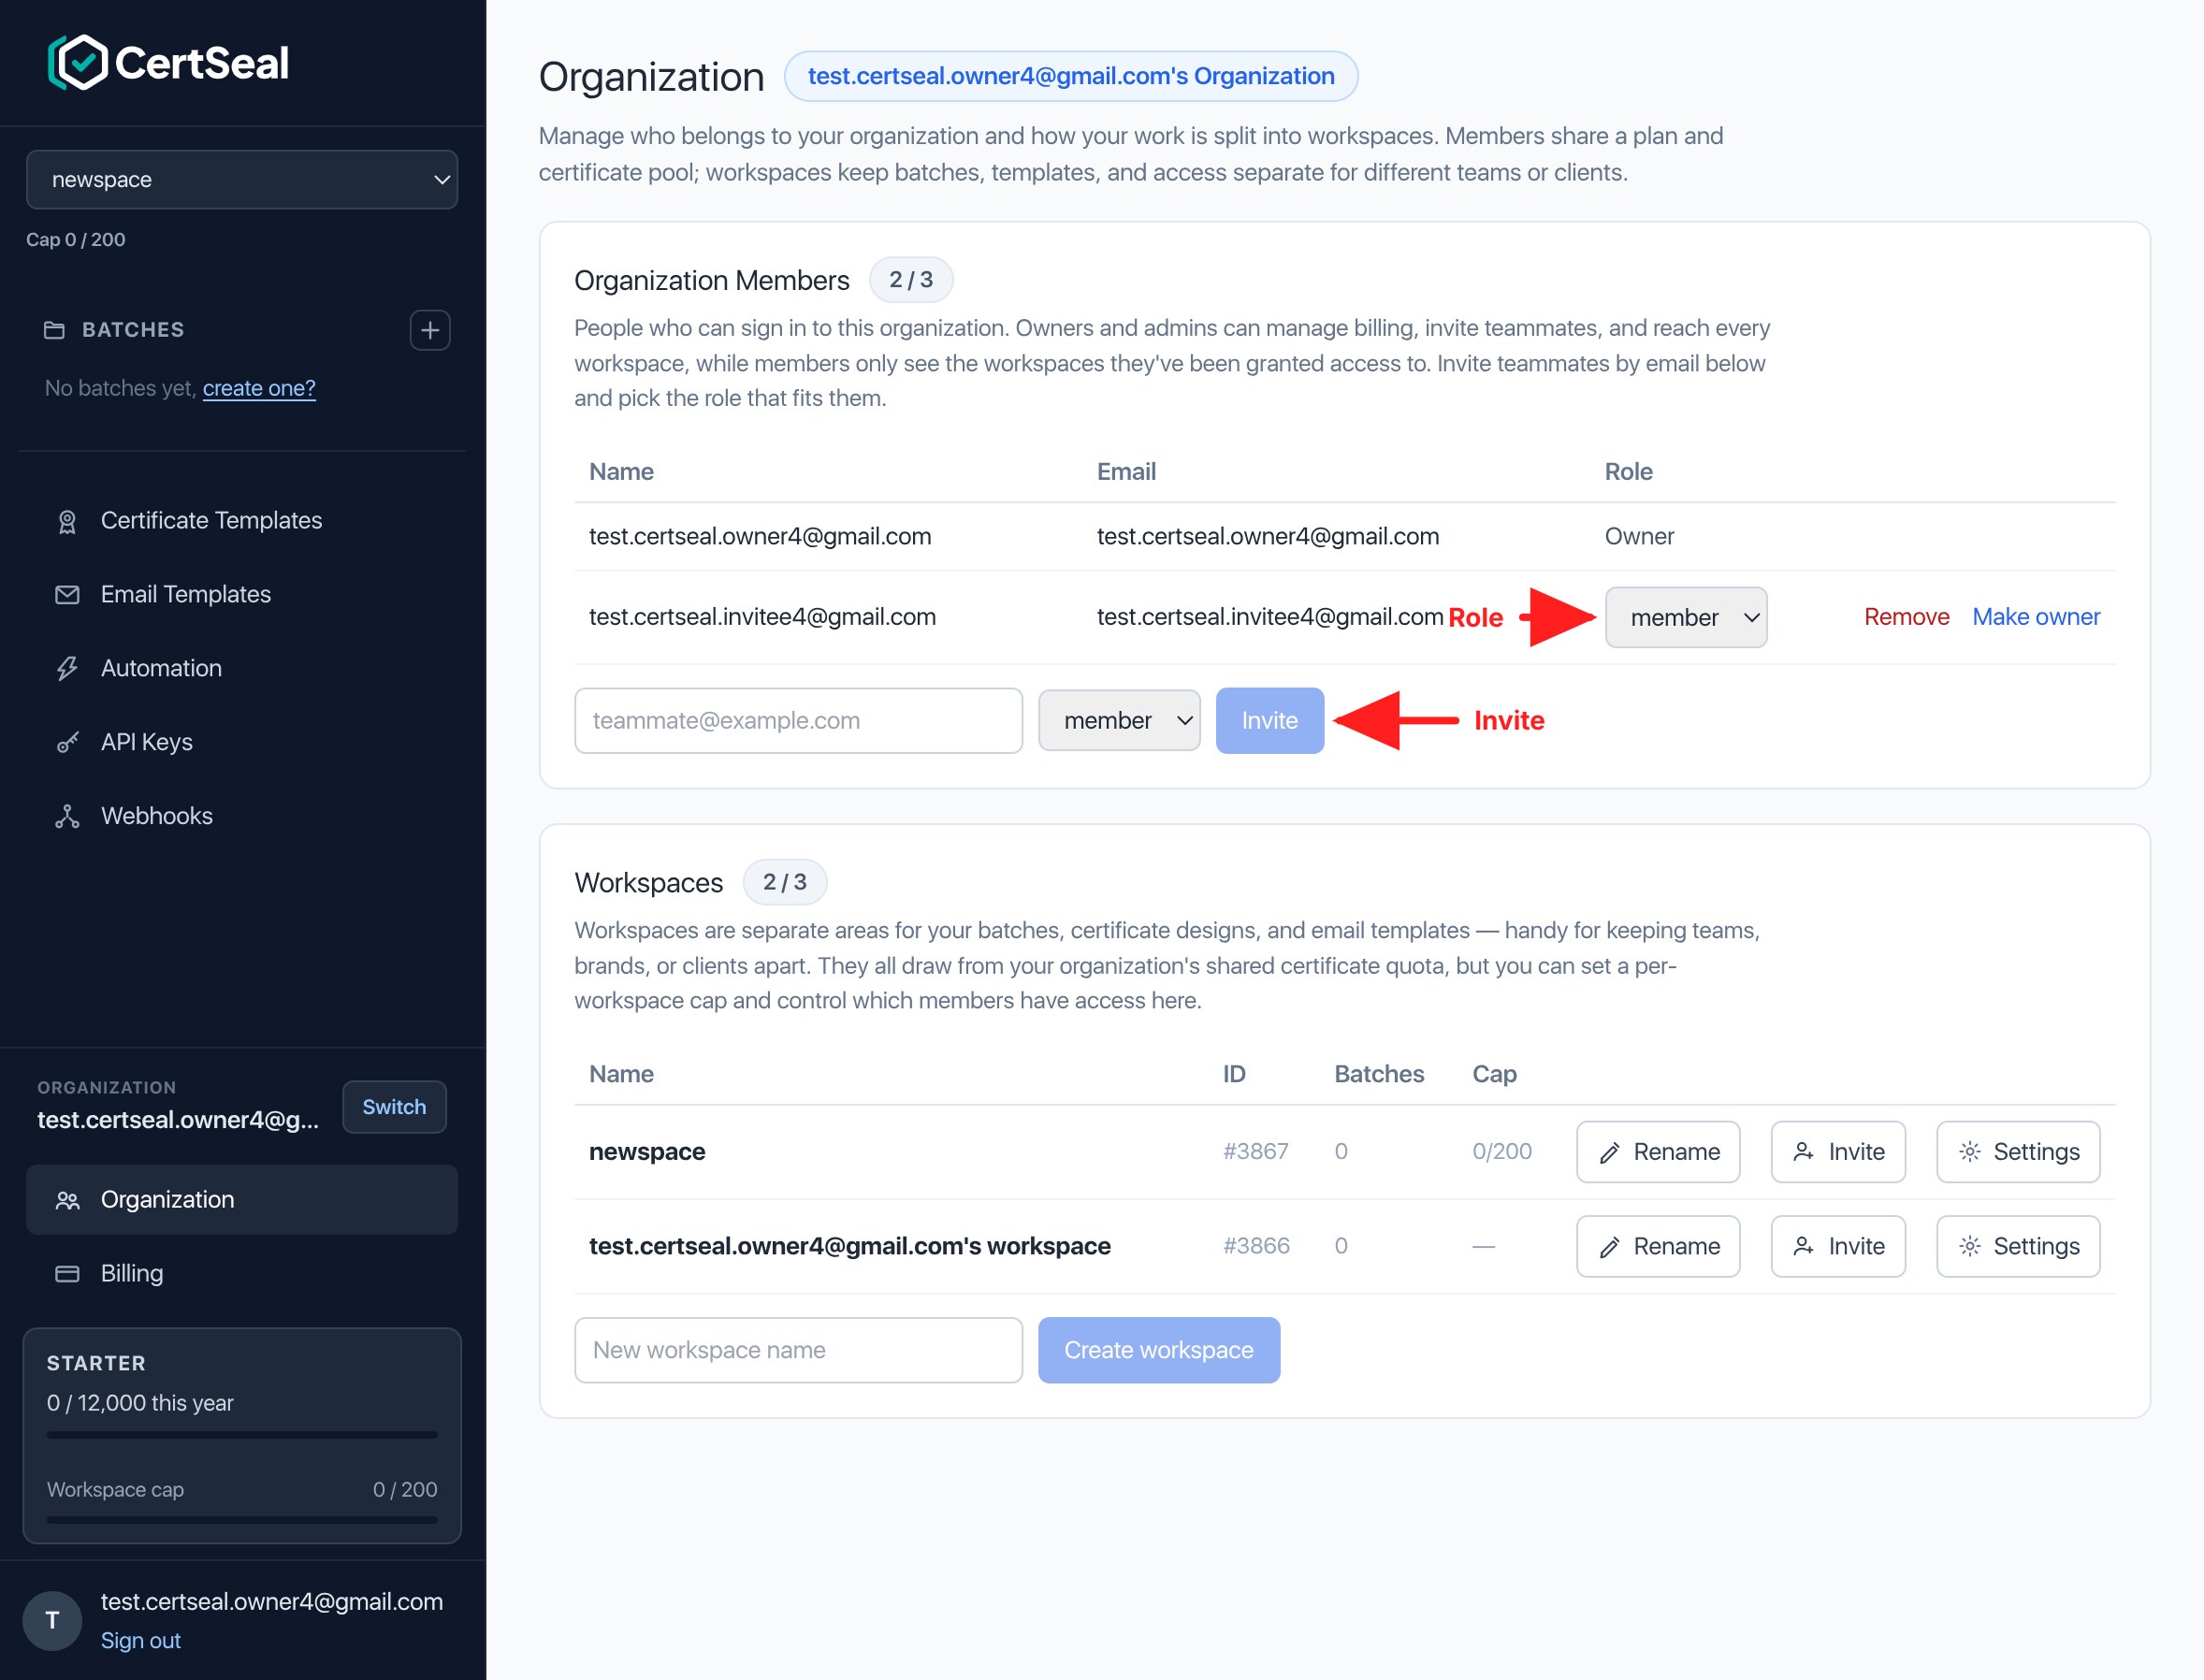
The Organization Members table lists everyone who can sign in. From here you can:
- Invite a teammate by entering their email, choosing a role, and clicking Invite. They’ll receive an email invite that’s valid for 7 days.
- Change a role using the role dropdown next to a member.
- Remove a member from the organization.
- Make owner — owners can promote another member to owner.
A few guardrails keep your organization safe:
- You can’t remove the last owner. Removing a member, changing a role, or leaving is blocked if it would leave the organization with no owners.
- Only owners can grant or remove the owner role. Transferring ownership promotes the other person to owner and moves you down to admin.
- The number of members you can add depends on your plan (pending invites count toward the limit).
Workspaces
The Workspaces table on the same page is where you organize your content and control access. Each workspace can be renamed, and you can add new ones with Create workspace.
Giving a member access to a workspace
There are two ways to give a regular member access to a workspace:
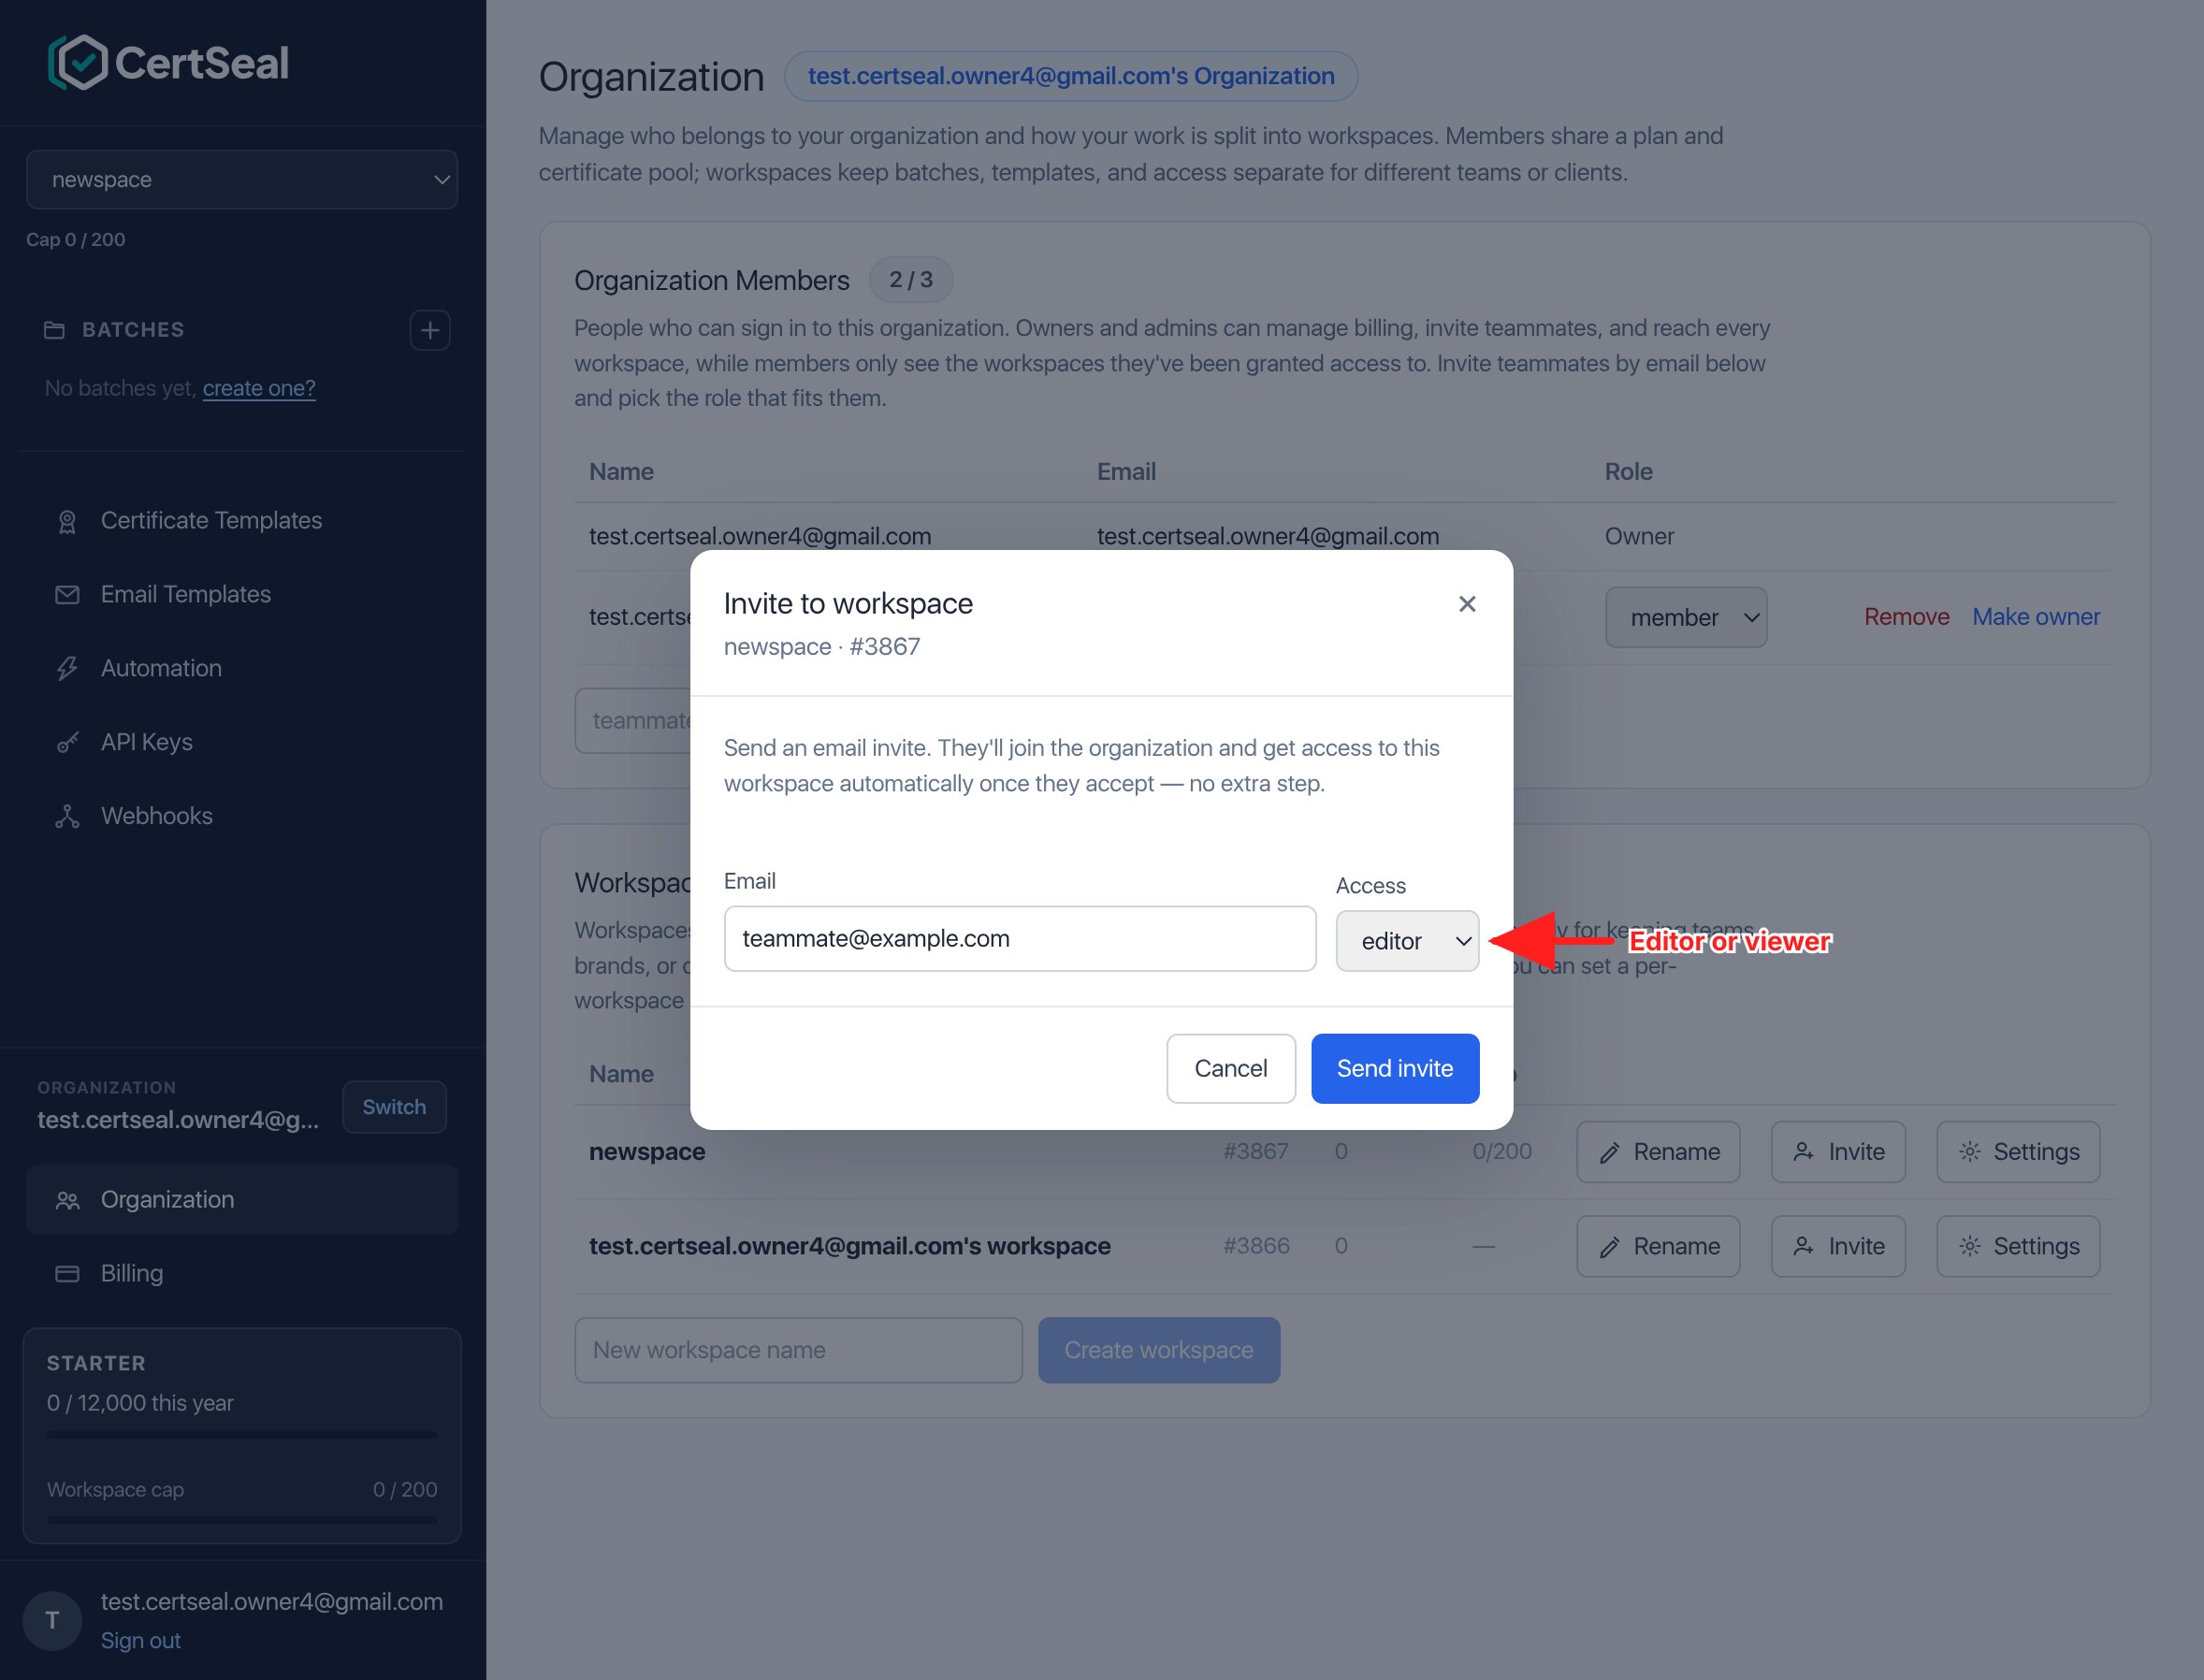
- Invite — click Invite on a workspace row to send an email invite that joins the person to the organization and grants them access to that workspace in one step. Choose whether they join as an editor or a viewer.
- Workspace settings — click Settings on a workspace row to grant access to existing members. Under Member access, pick a member, choose editor or viewer, and click Grant access. (Owners and admins already reach every workspace, so they don’t need a grant.)
Setting a certificate cap
By default every workspace draws freely from your organization’s shared certificate quota. If you want to limit how many certificates a single workspace can issue in a billing cycle — handy when different clients or teams share one plan — set a Certificate cap in Workspace settings. Leave it blank to remove the cap and go back to the shared pool.
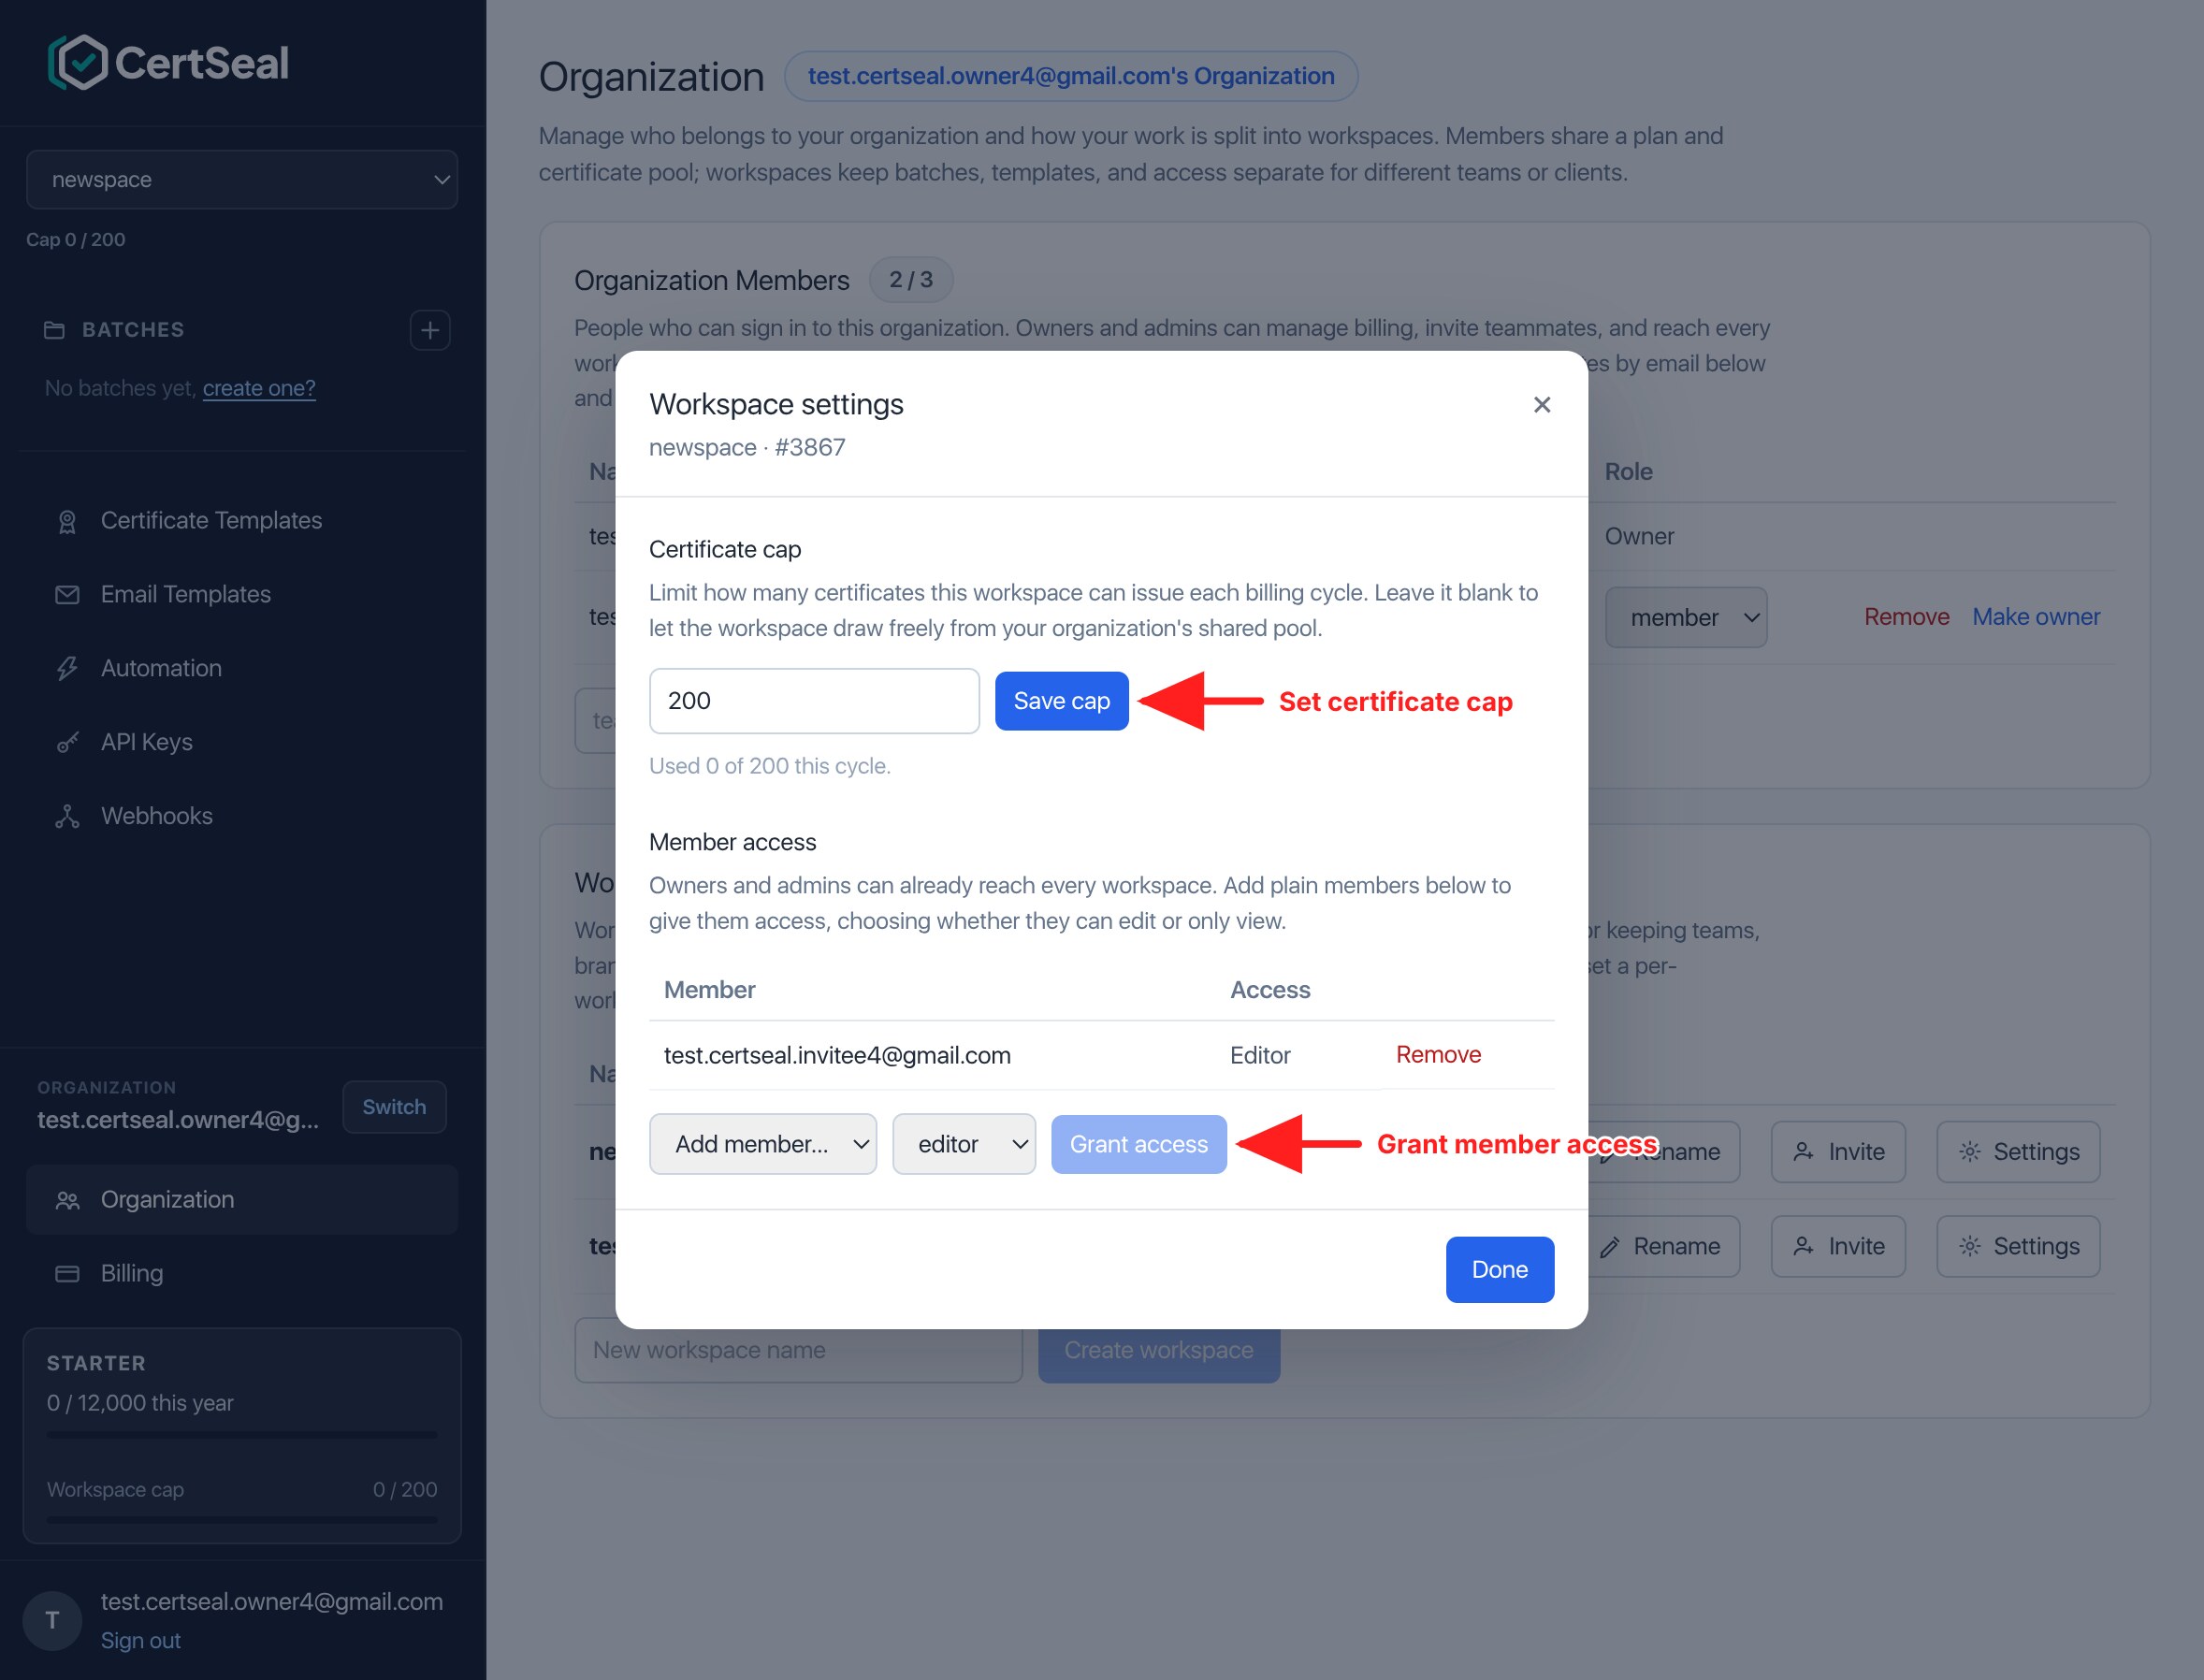
The current cap and usage show up in the Workspaces table, in this dialog, and in the sidebar for the active workspace.
Billing and quota
Your subscription and certificate quota belong to the organization, and every workspace shares that same pool. Only owners and admins can see and manage billing from the Billing page.
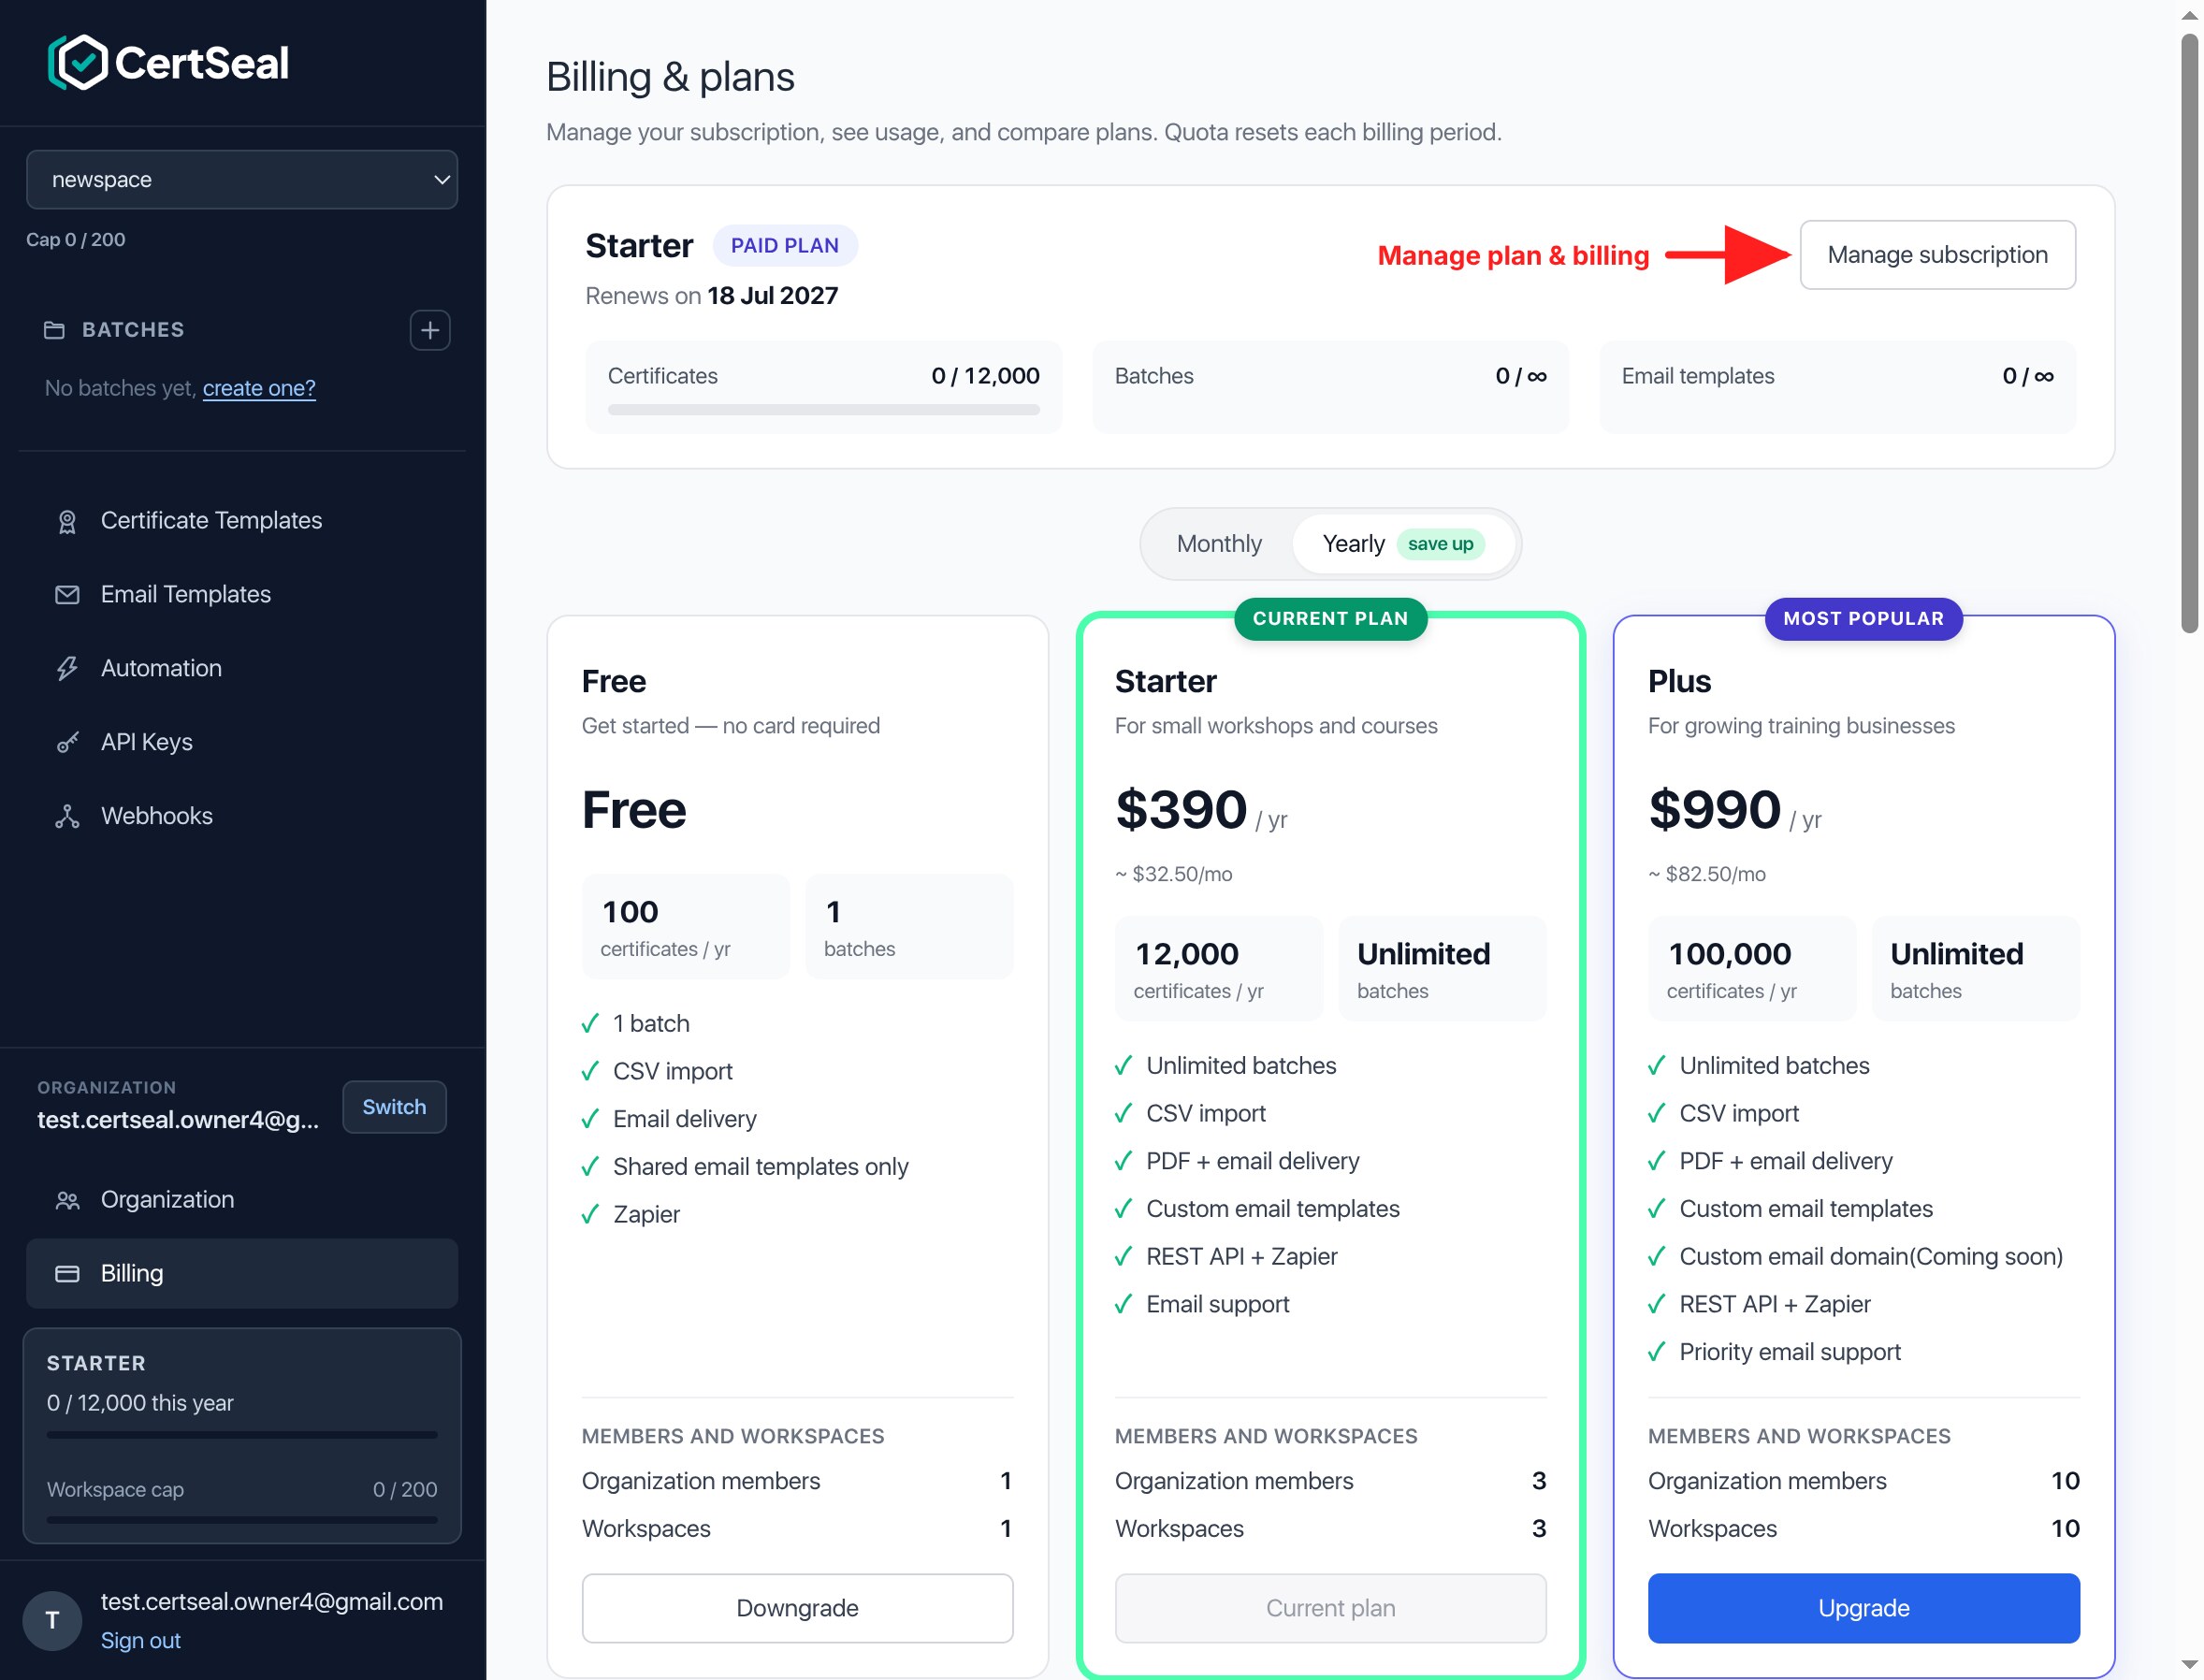
Each plan also sets how many organization members and workspaces you can have. If you hit a limit, upgrade your plan to add more. A per-workspace certificate cap (above) is an optional ceiling on top of your organization’s overall quota — it never increases your total, it only limits how much a single workspace can use.
Support
Questions about organizations, workspaces, or access? Email support@certseal.com and a real person will reply, typically within 1 business day (Monday–Friday, 9:00 AM–6:00 PM SGT). See the support guide for all contact options and response times.