Getting started
Create and manage a batch
Last updated: July 19, 2026
A batch groups everyone who should receive a certificate from one design — a class, a cohort, an event roster. It ties together a design, an optional email template, and your recipients, then sends a personalized certificate to each one.
Batches are the heart of CertSeal. Open Batches in the left sidebar to see all your batches, switch between Active and Archived, and open any batch to manage its recipients.
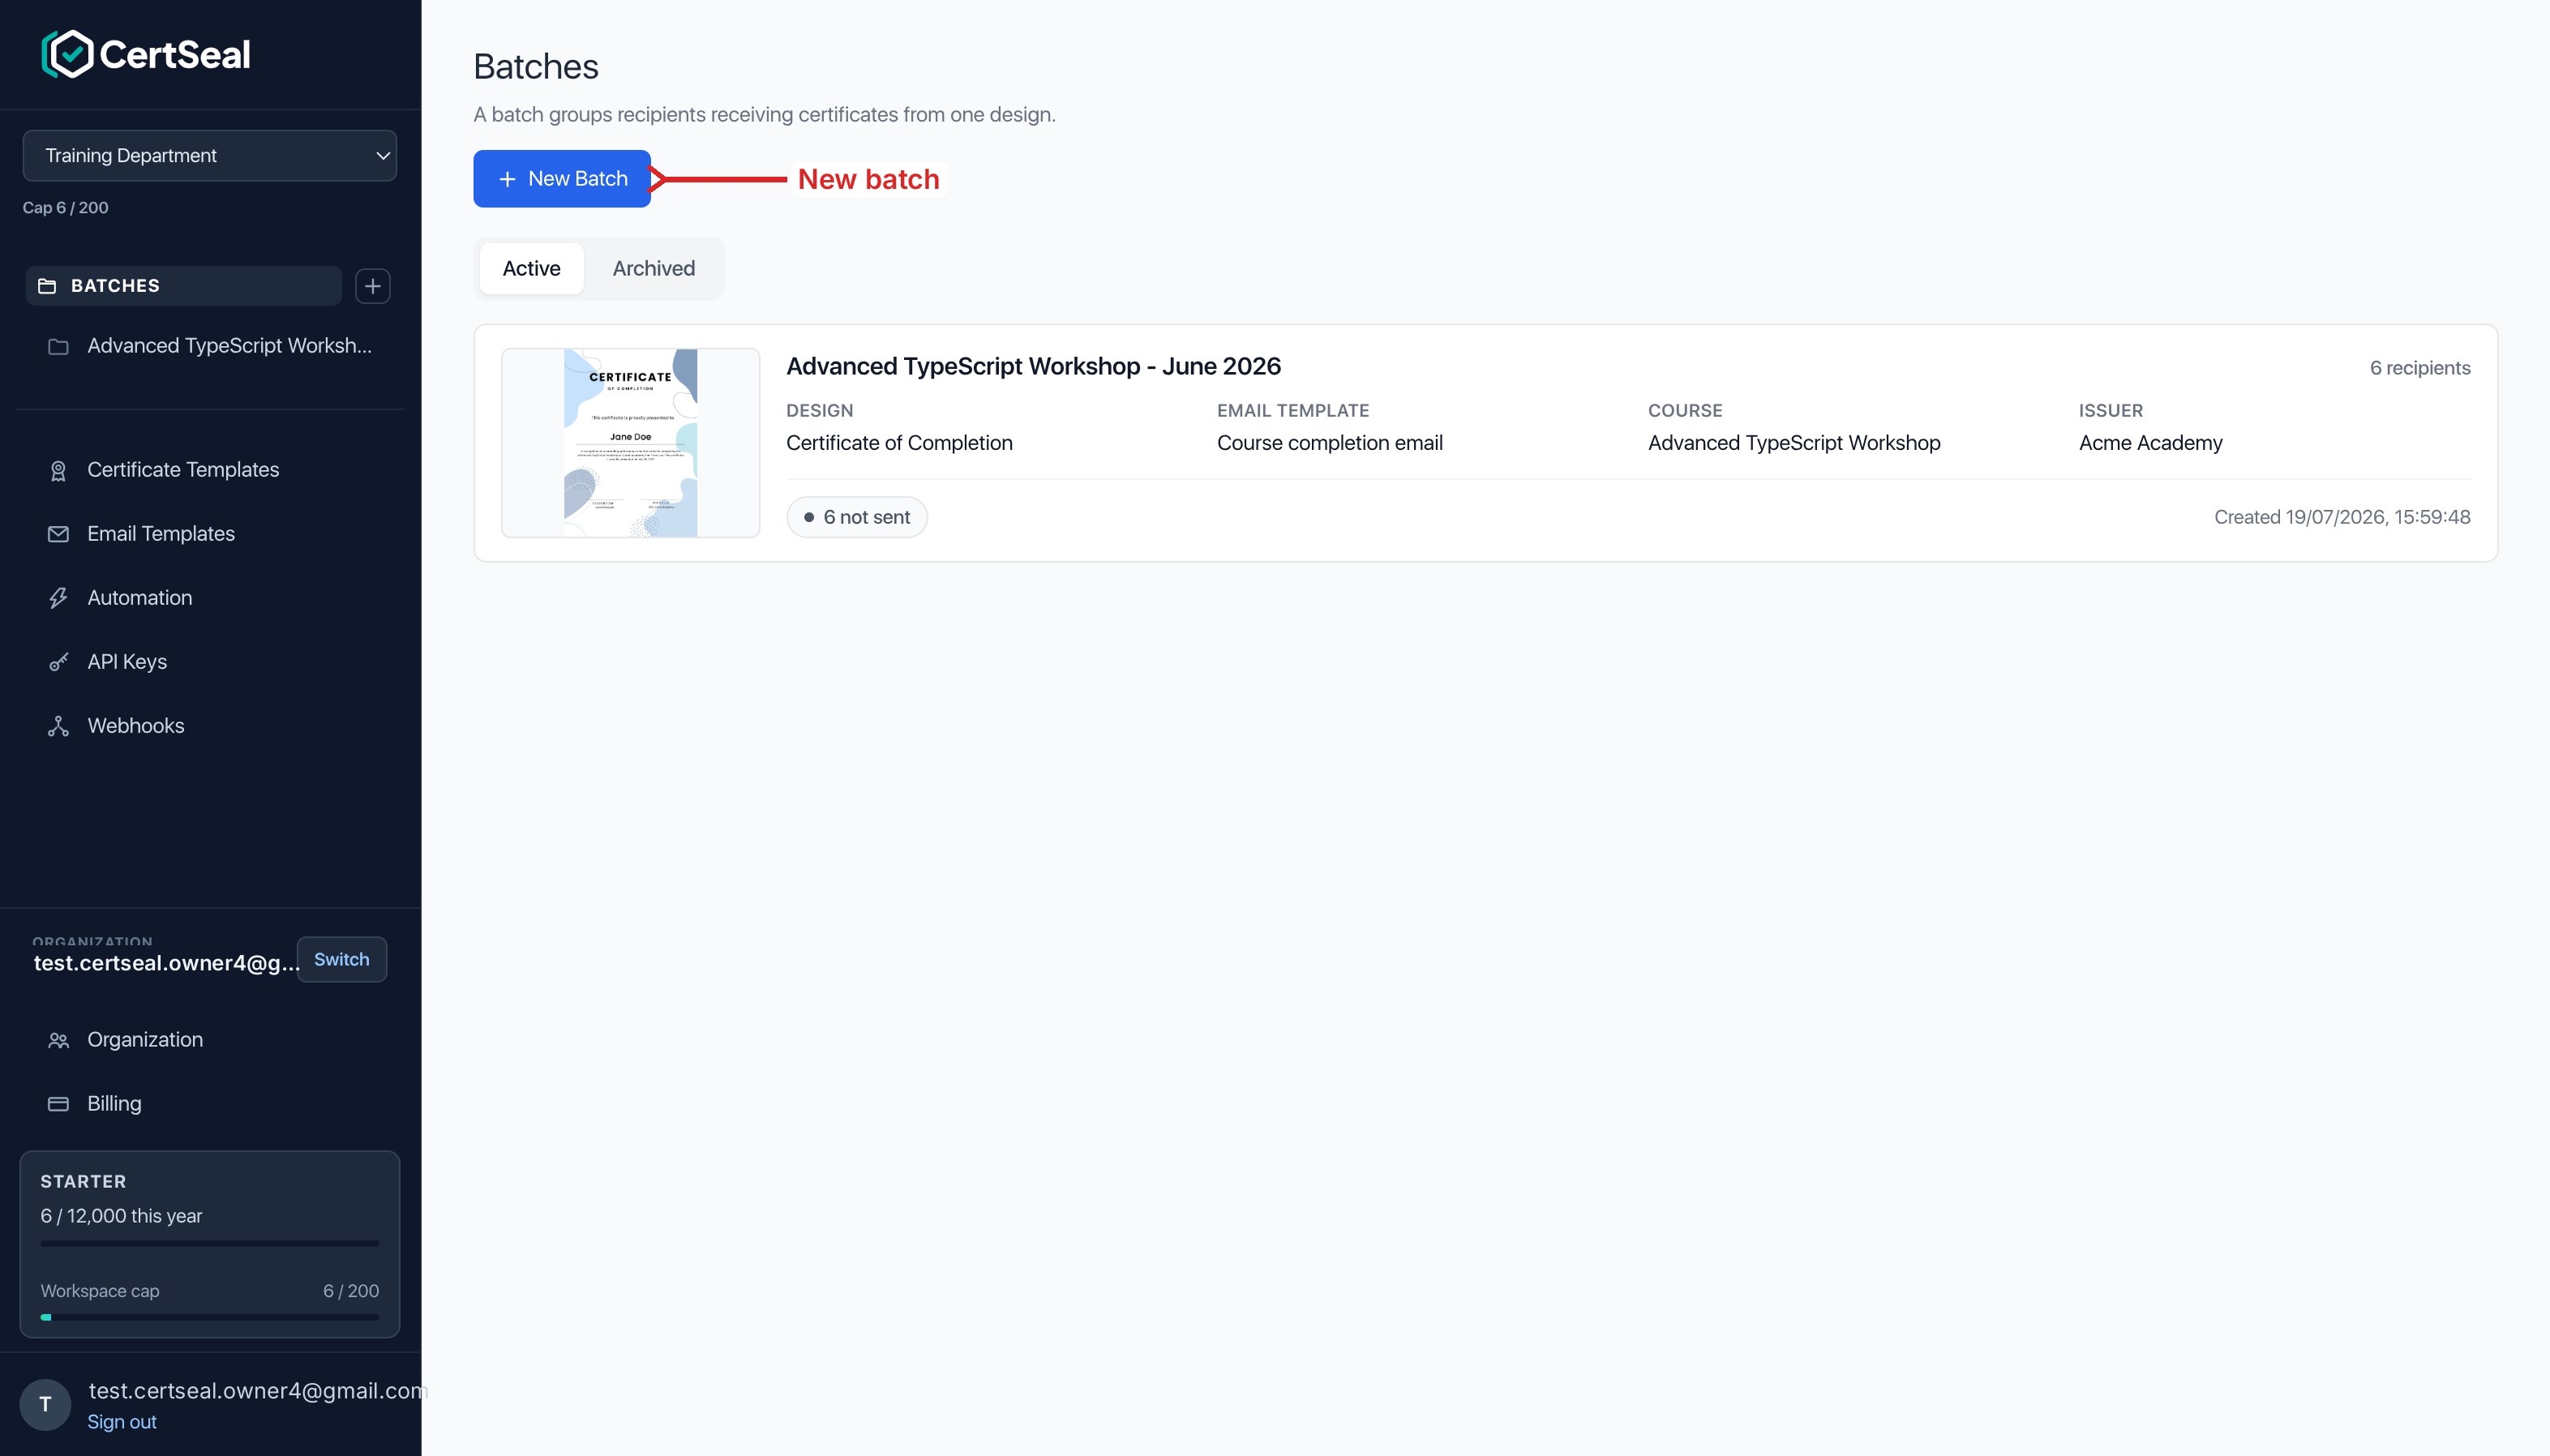
Before you create a batch, it helps to have a certificate template ready (you can also start from a template in the New Batch dialog) and, optionally, an email template.
Create a batch
Click New Batch to open the dialog, then fill in the details:
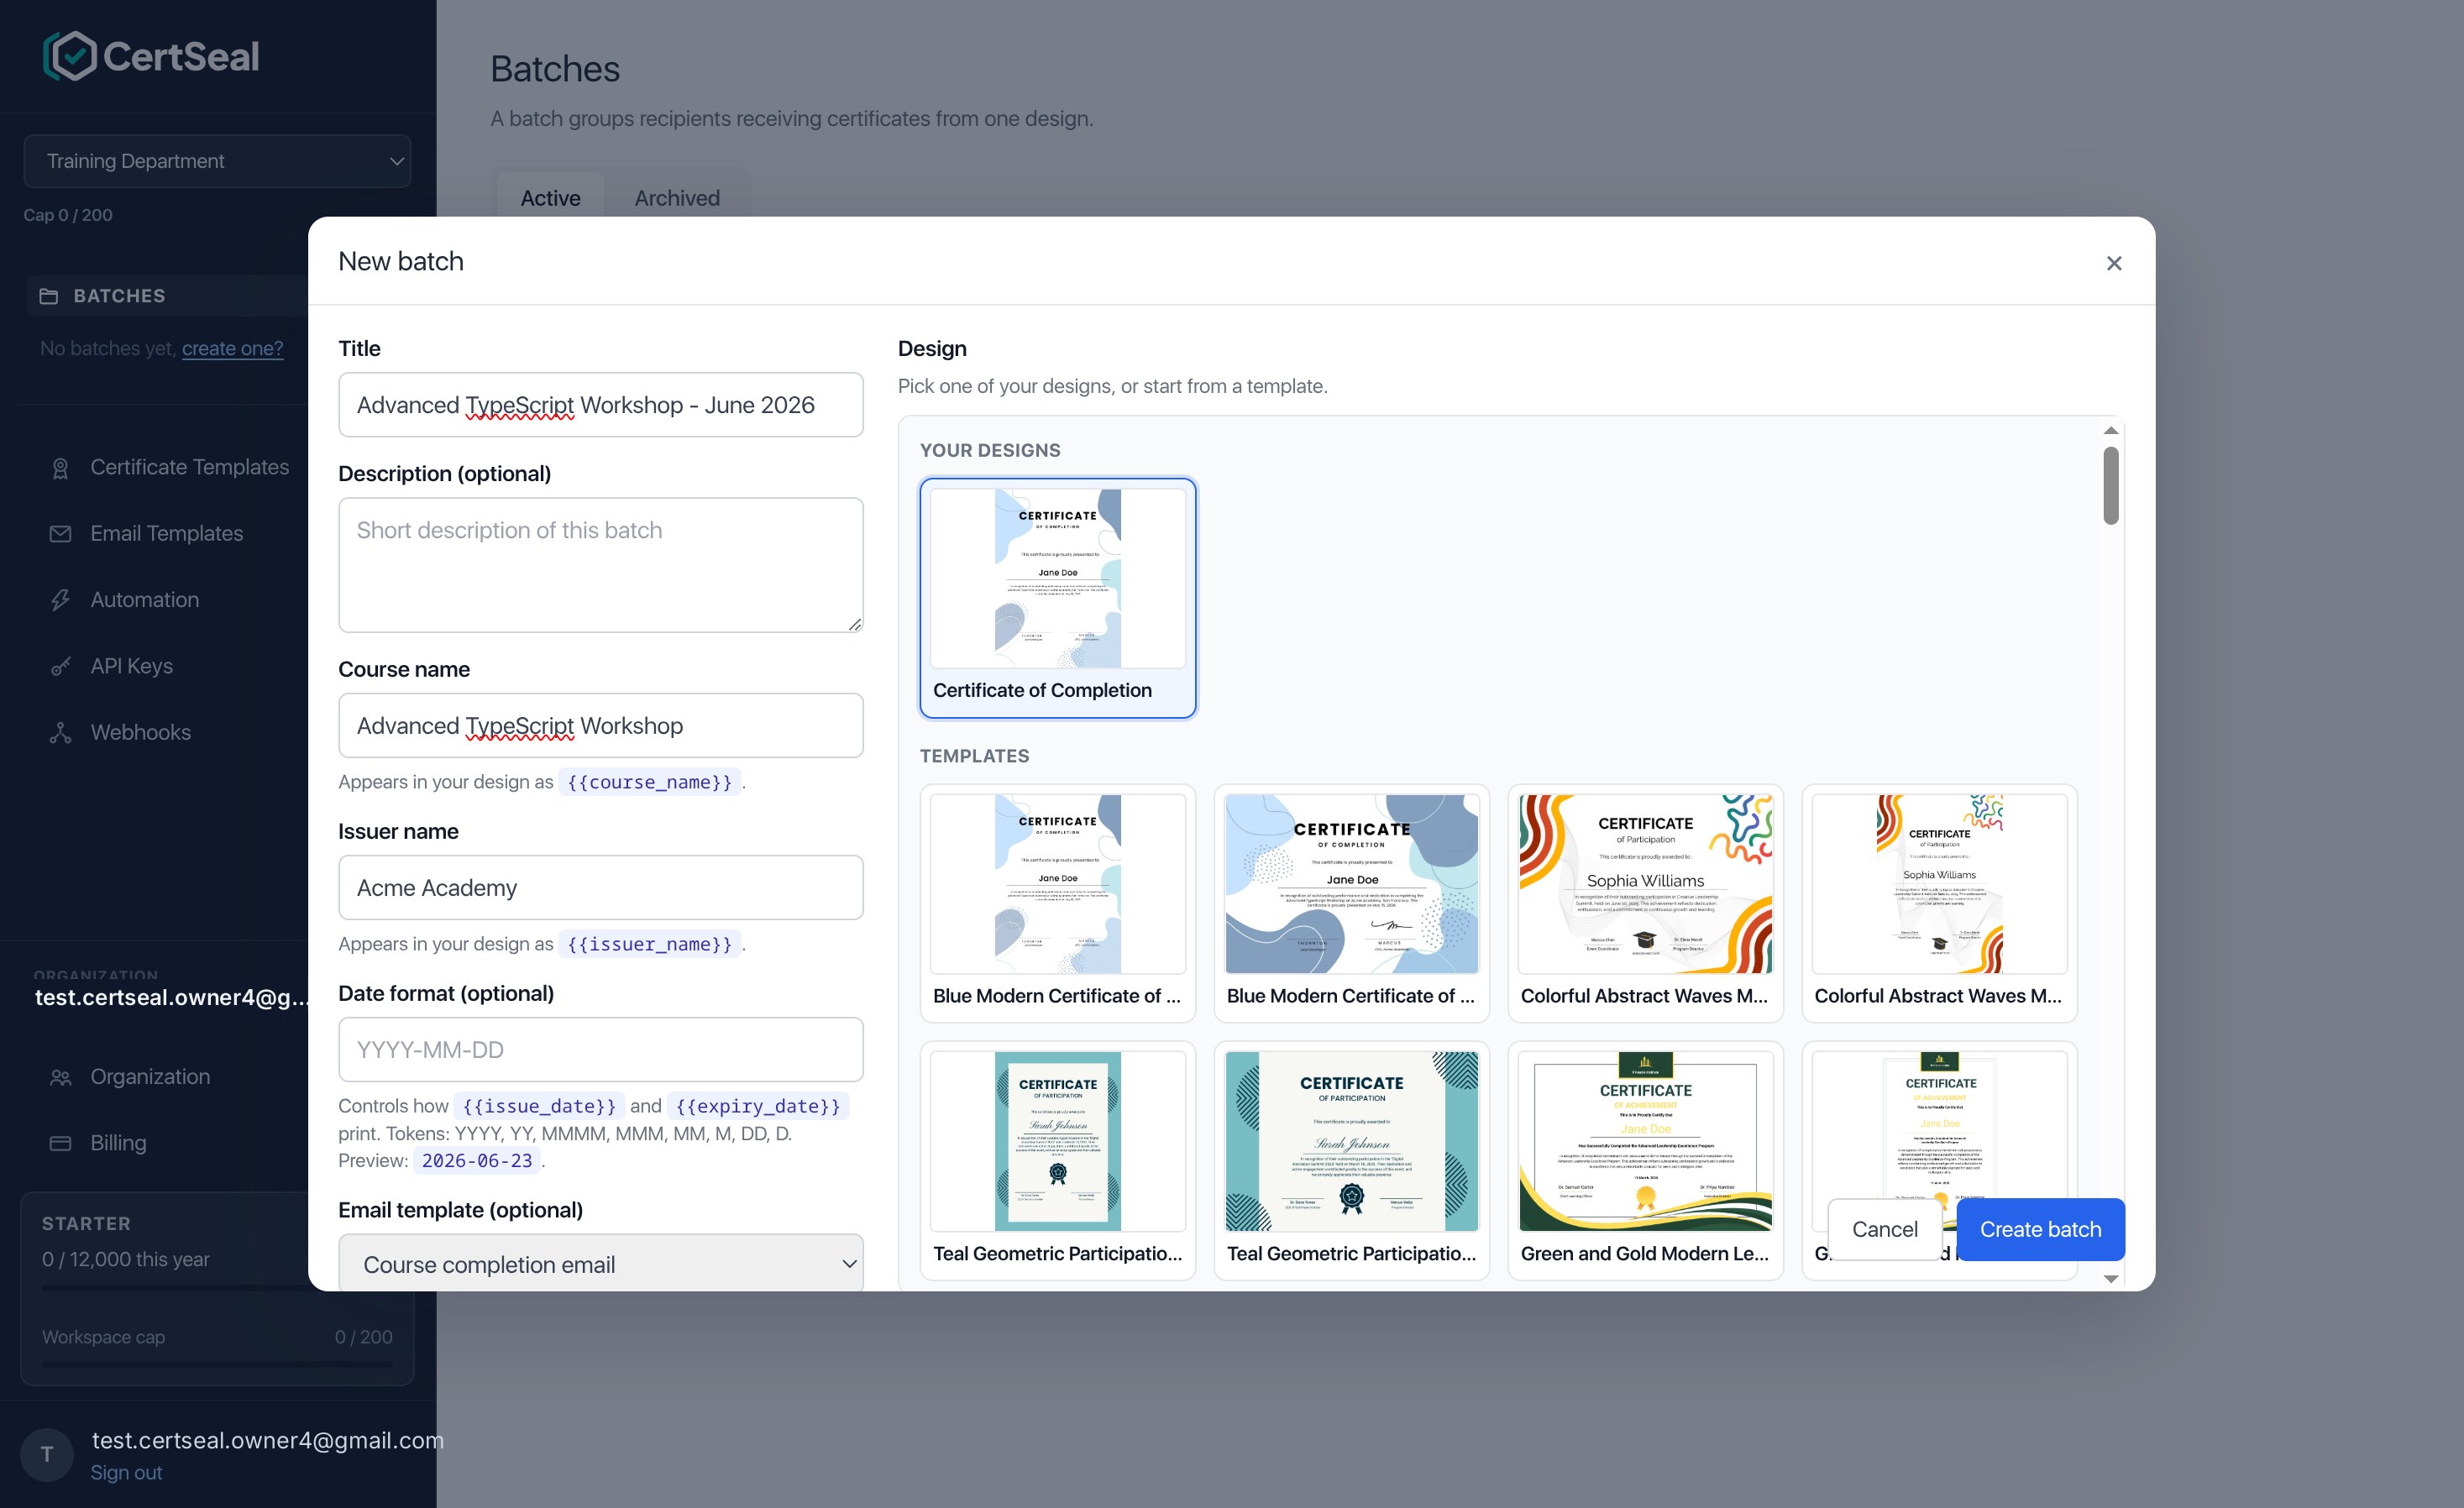
- Title — a name for this batch, e.g. “Advanced TypeScript Workshop – June 2026”.
- Description (optional) — a note for your own reference.
- Course name — becomes the default
{{course_name}}on every certificate in the batch. - Issuer name — becomes the default
{{issuer_name}}(your organization or program). - Date format (optional) — controls how
{{issue_date}}and{{expiry_date}}print. Use tokens likeYYYY,MMMM,MMM,MM,DD. Leave blank for the defaultYYYY-MM-DD. - Email template (optional) — the email that delivers each certificate. You can add one later.
- Design — pick one of your designs, or start from a ready-made template.
Click Create batch to open it.
The Overview tab
A batch has two tabs: Overview and Recipients. The Overview tab is where you review and adjust the batch’s settings — its title, course and issuer names, design, email template, and date format — and where you’ll find a shortcut to import recipients when the batch is empty.
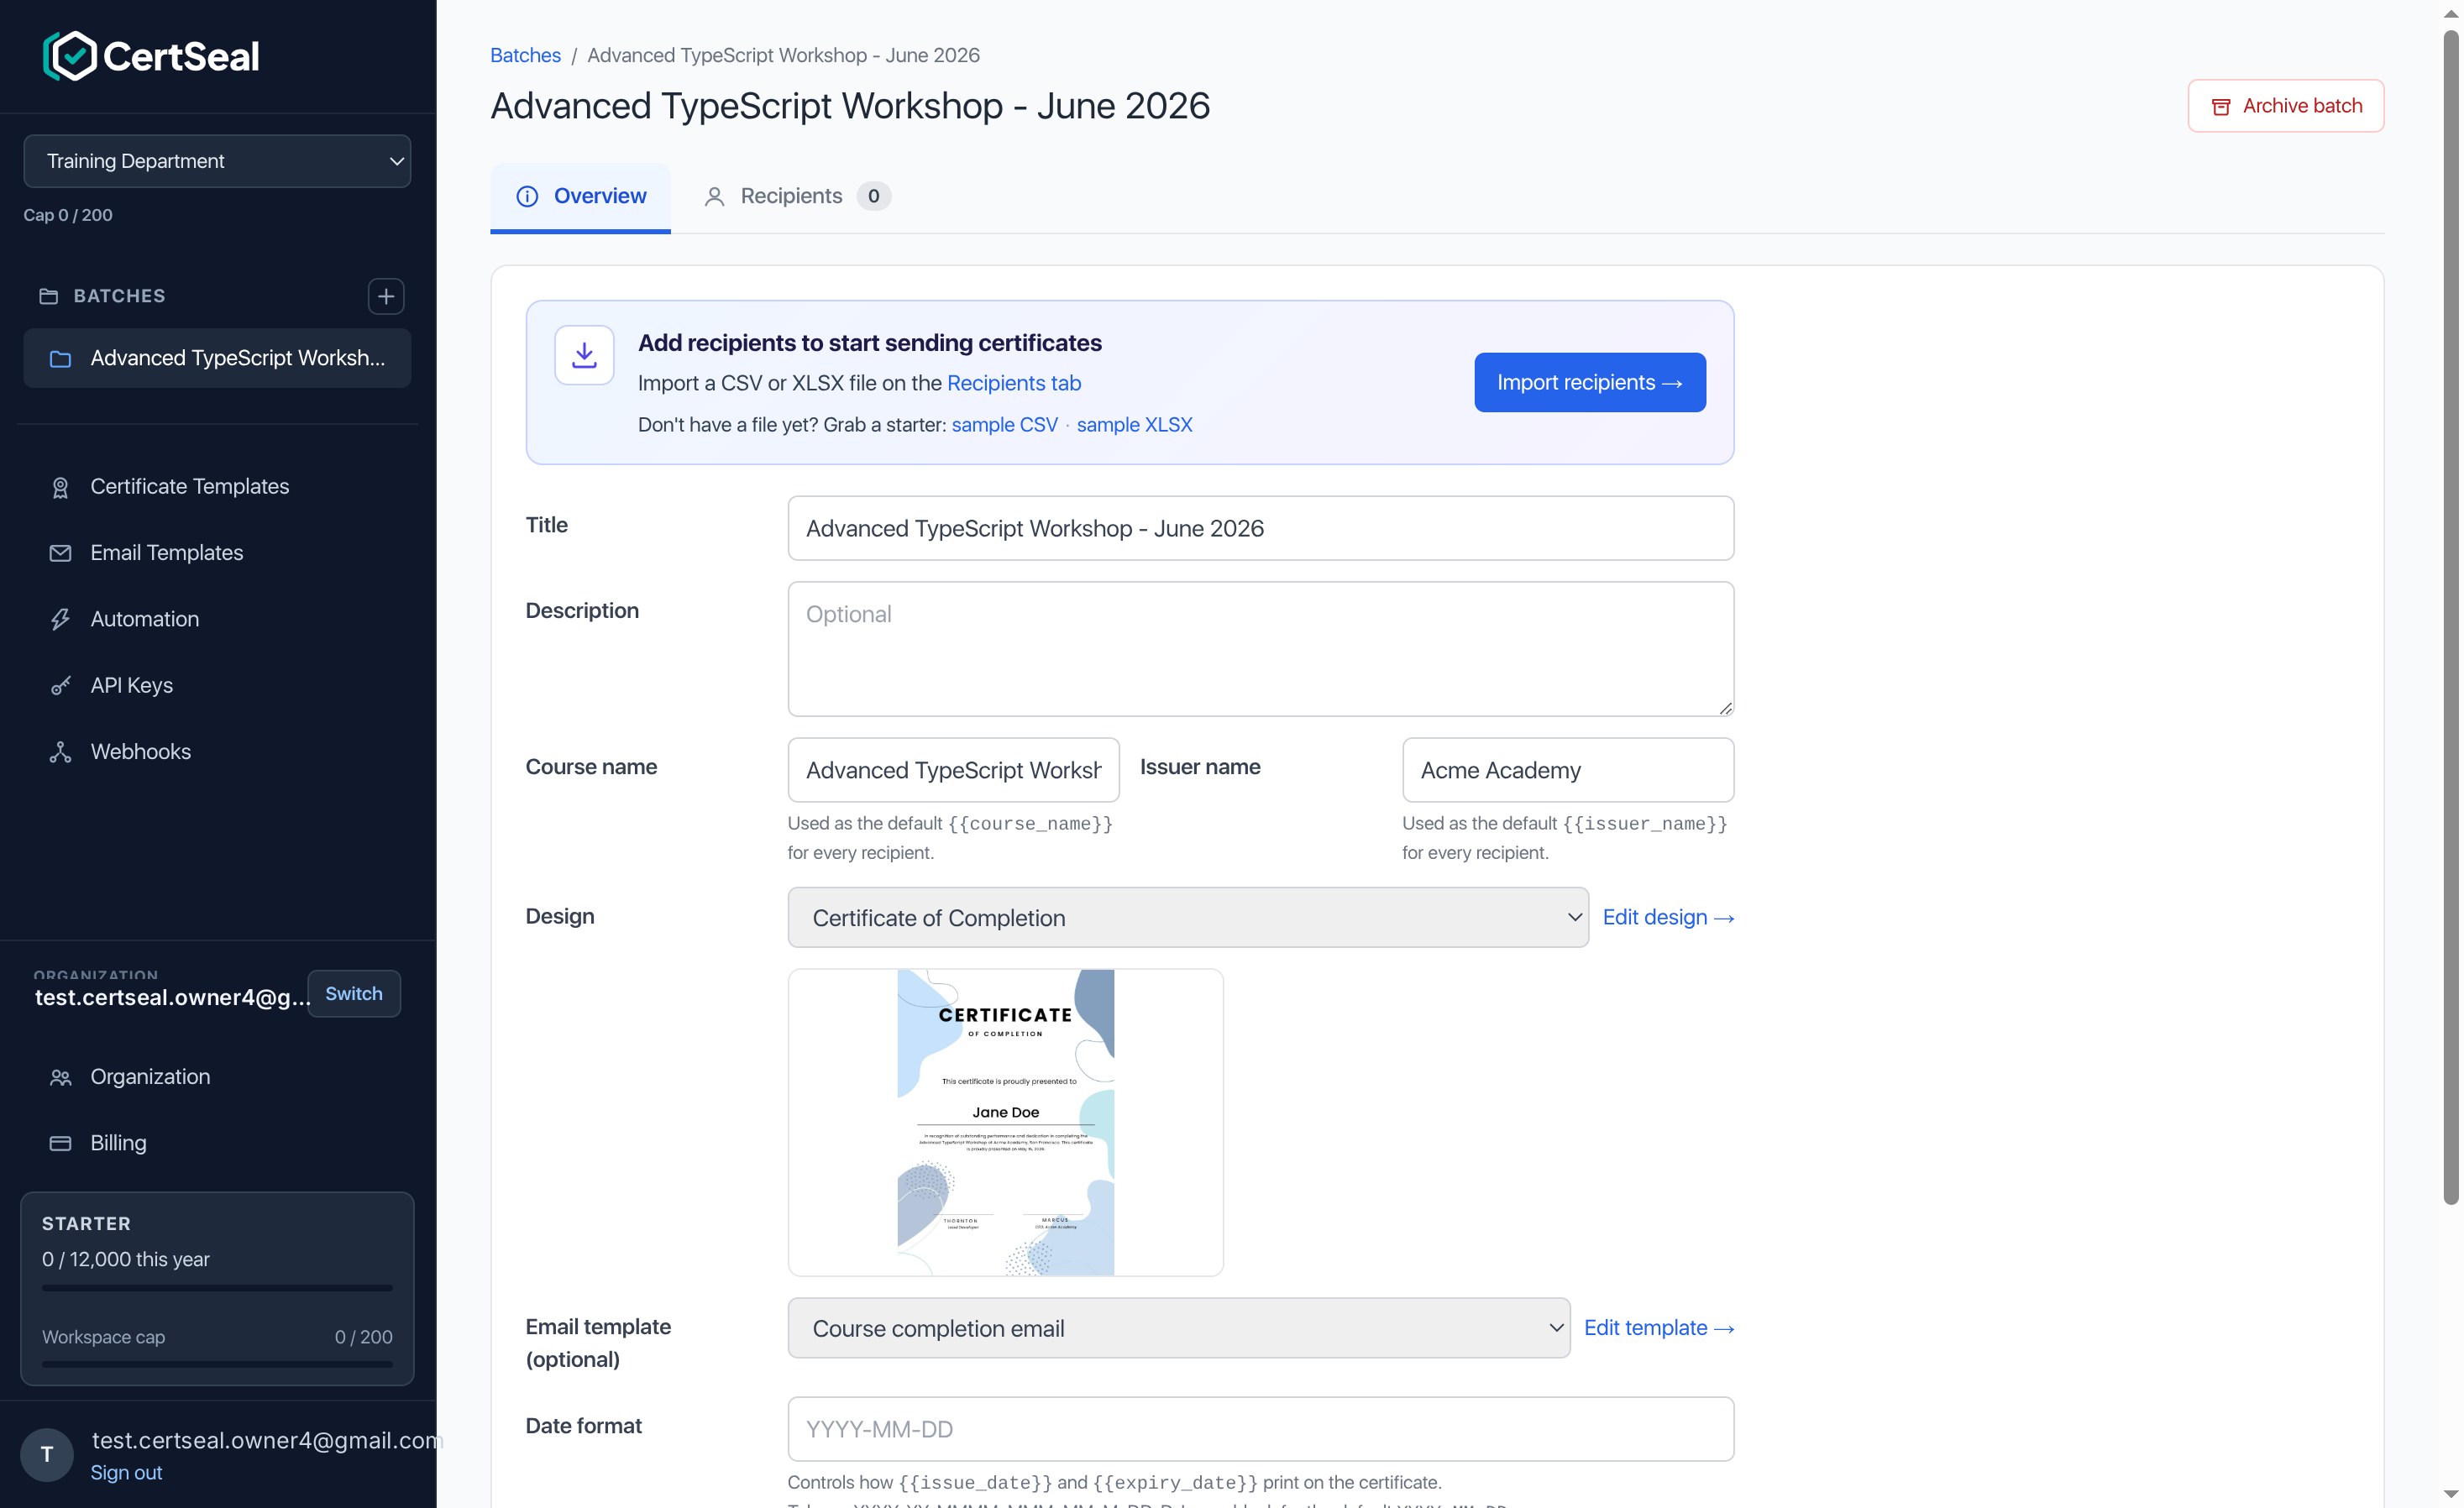
You can change the design or email template here at any time, and jump into the editor with Edit design or Edit template.
Import recipients
Switch to the Recipients tab and click Import CSV/XLSX. Not sure of the format? Download the sample CSV or sample XLSX to see the expected columns.
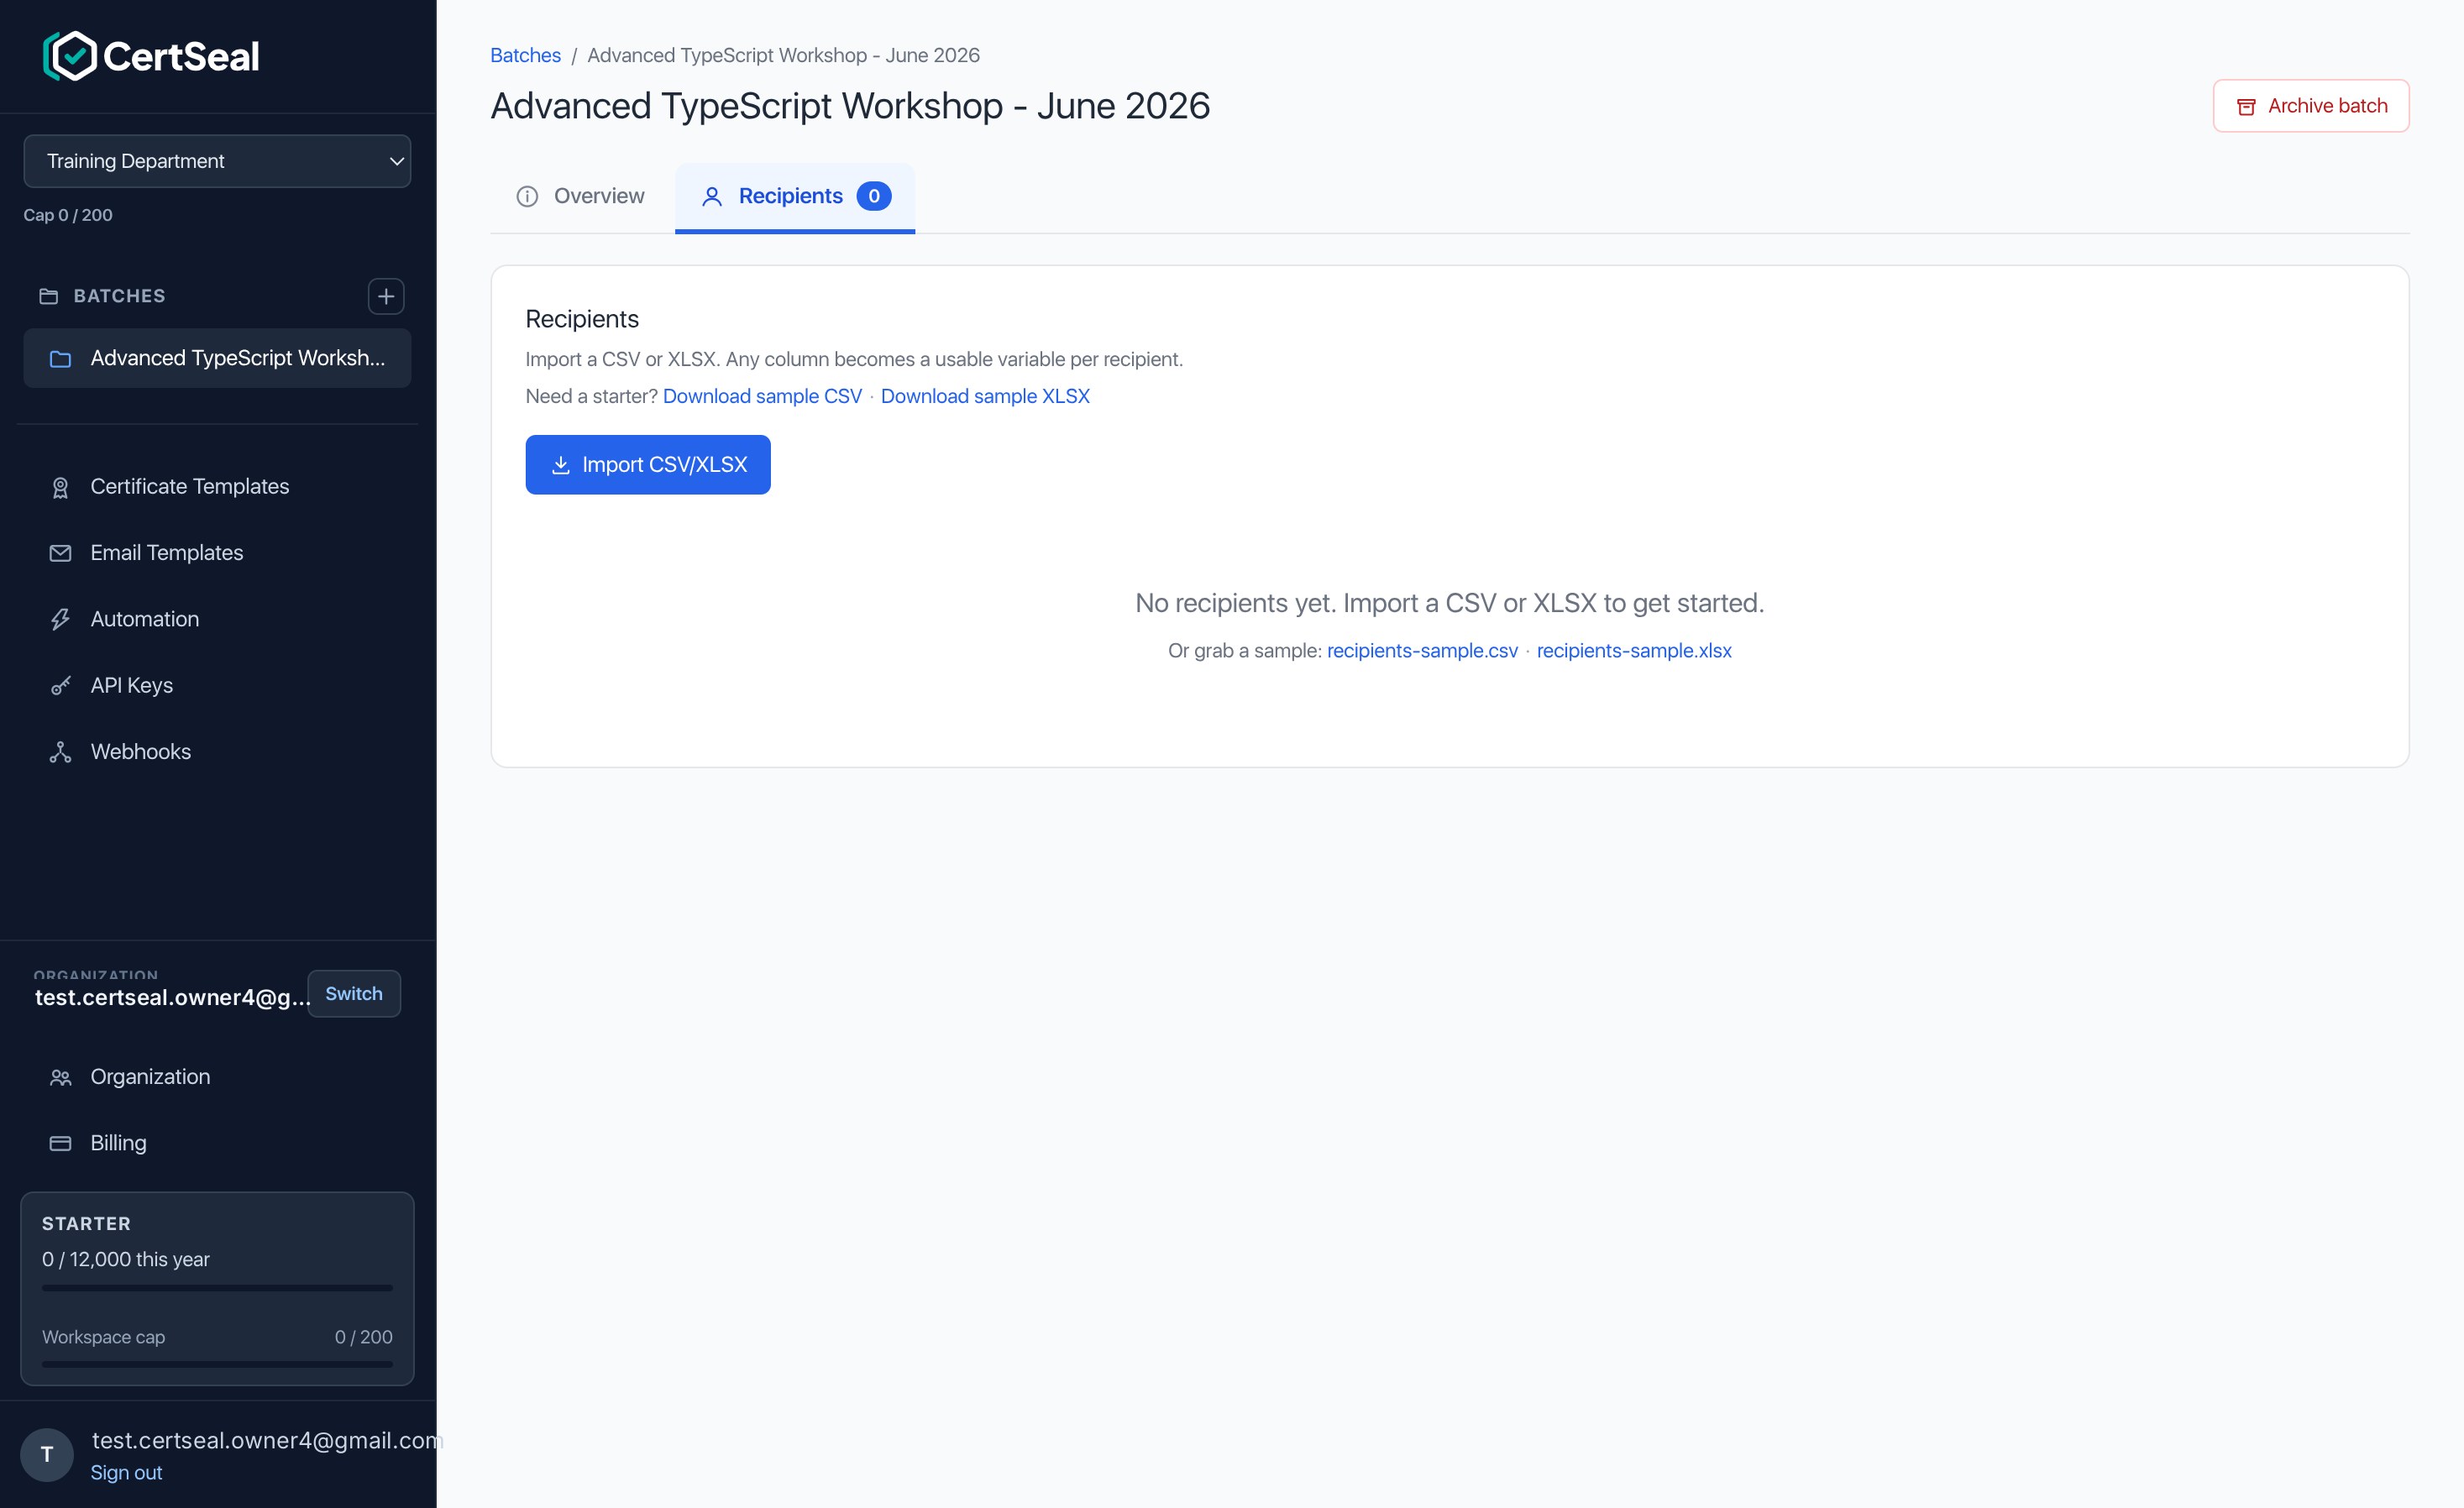
A recipient file needs at least a name and email column. Any extra column becomes a usable variable for that recipient — so a score column, for example, is available as {{score}} on the certificate and in the email. This is how you personalize beyond the built-in fields.
Review and send
Once imported, your recipients appear in a table with summary stats — how many recipients you have, and how many emails are sent, in queue, failed, or not queued. Each row shows the certificate ID, status, and quick actions: Preview cert, Download PDF, Preview email, Update, and Delete.
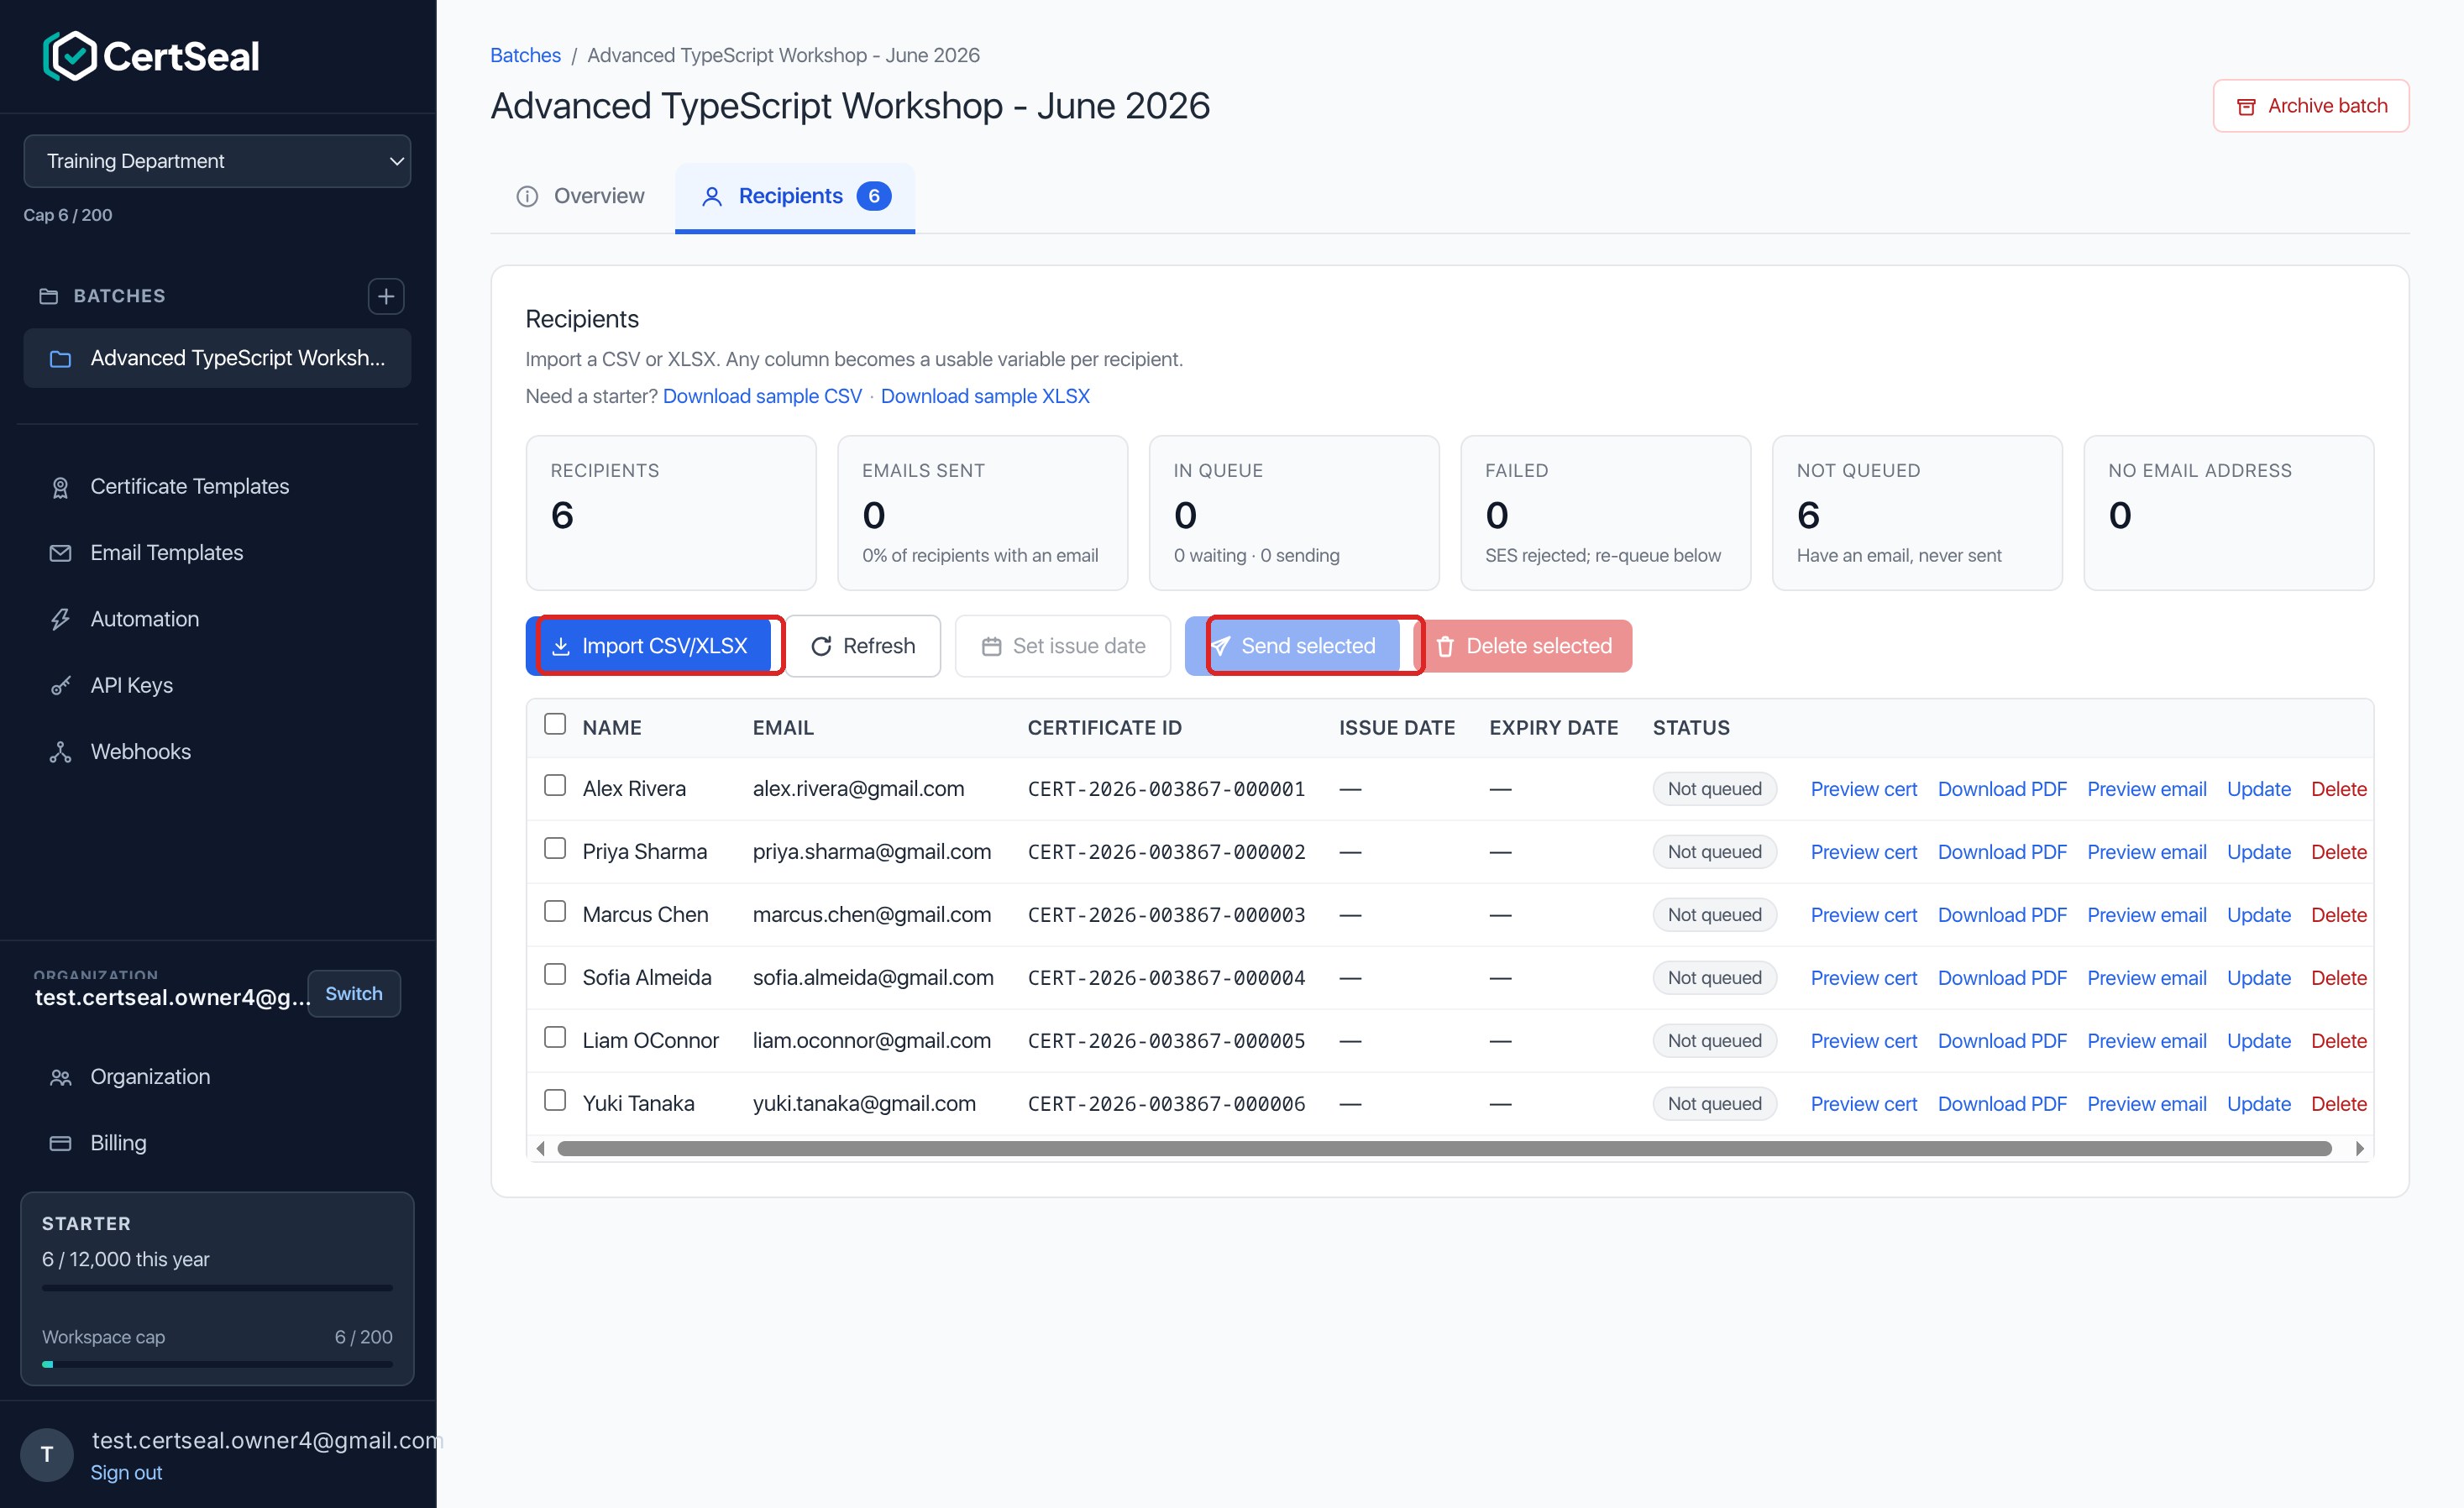
To send certificates:
- Select the recipients you want (use the header checkbox to select all).
- Click Send selected.
- Confirm in the dialog — CertSeal queues the emails and sends them in the background to avoid bursting your email provider, usually within a minute or two.
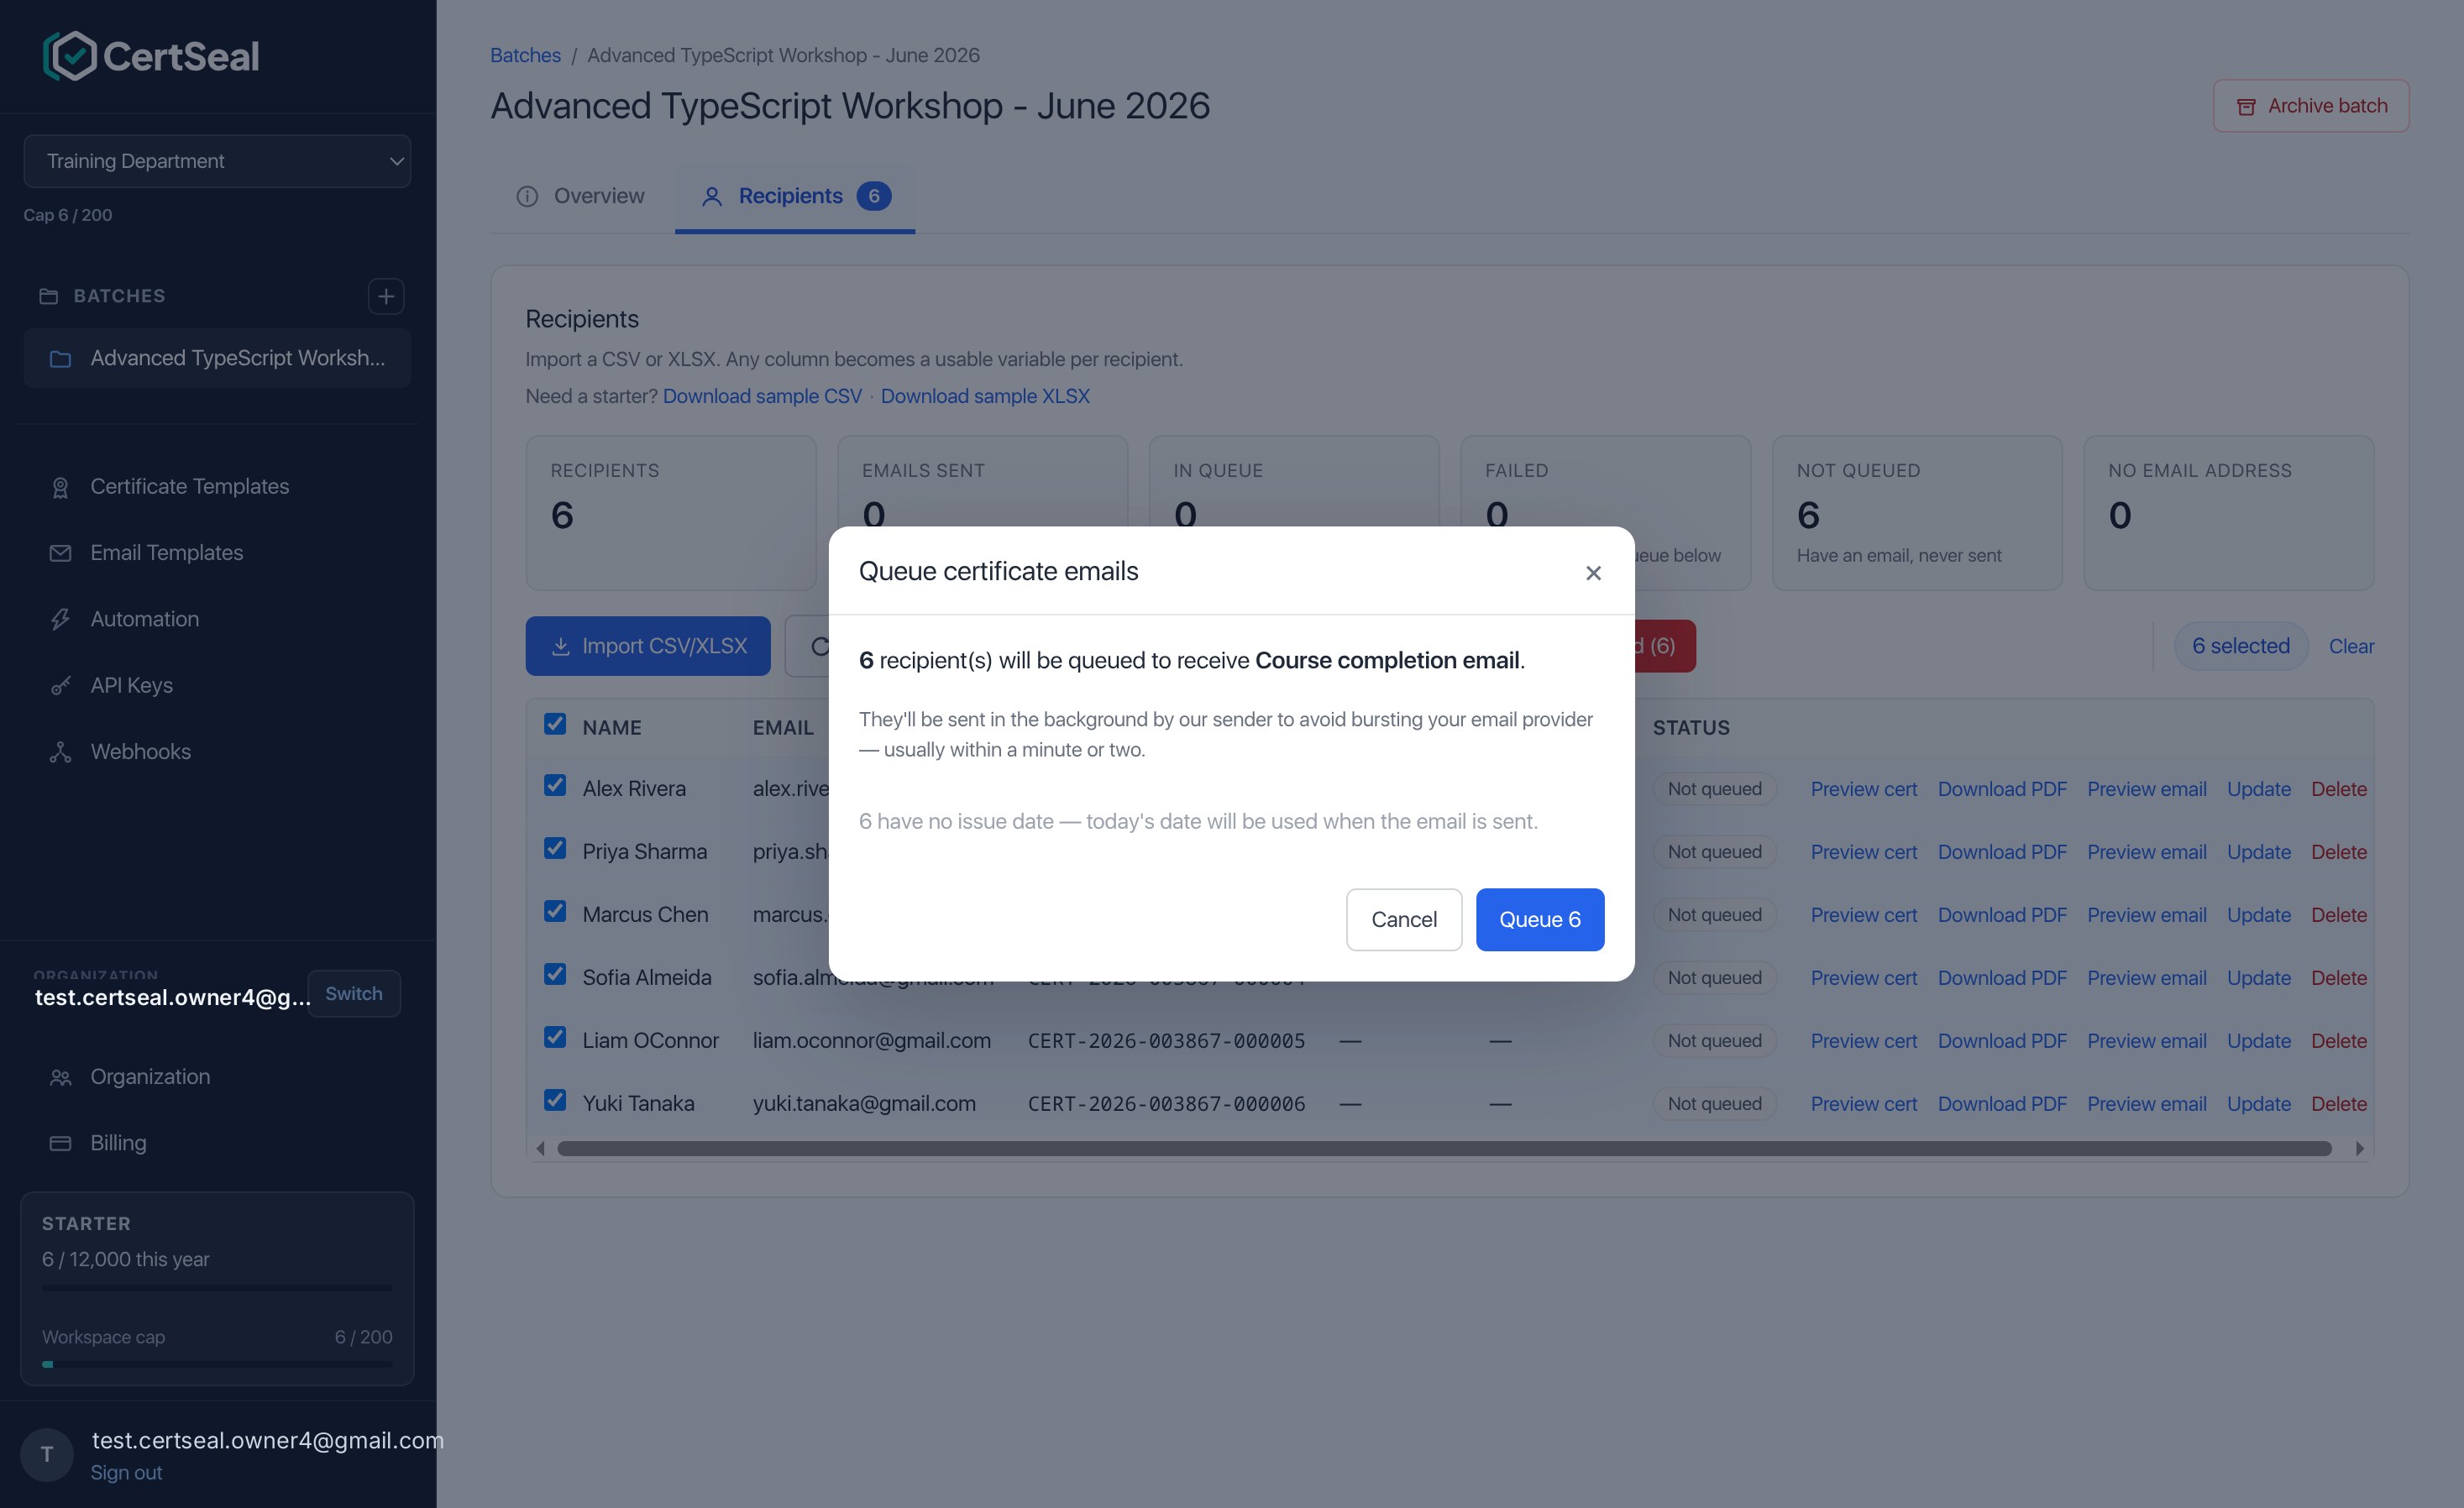
You can also Set issue date for selected recipients before sending; if you don’t, today’s date is used when each email goes out.
Preview a certificate
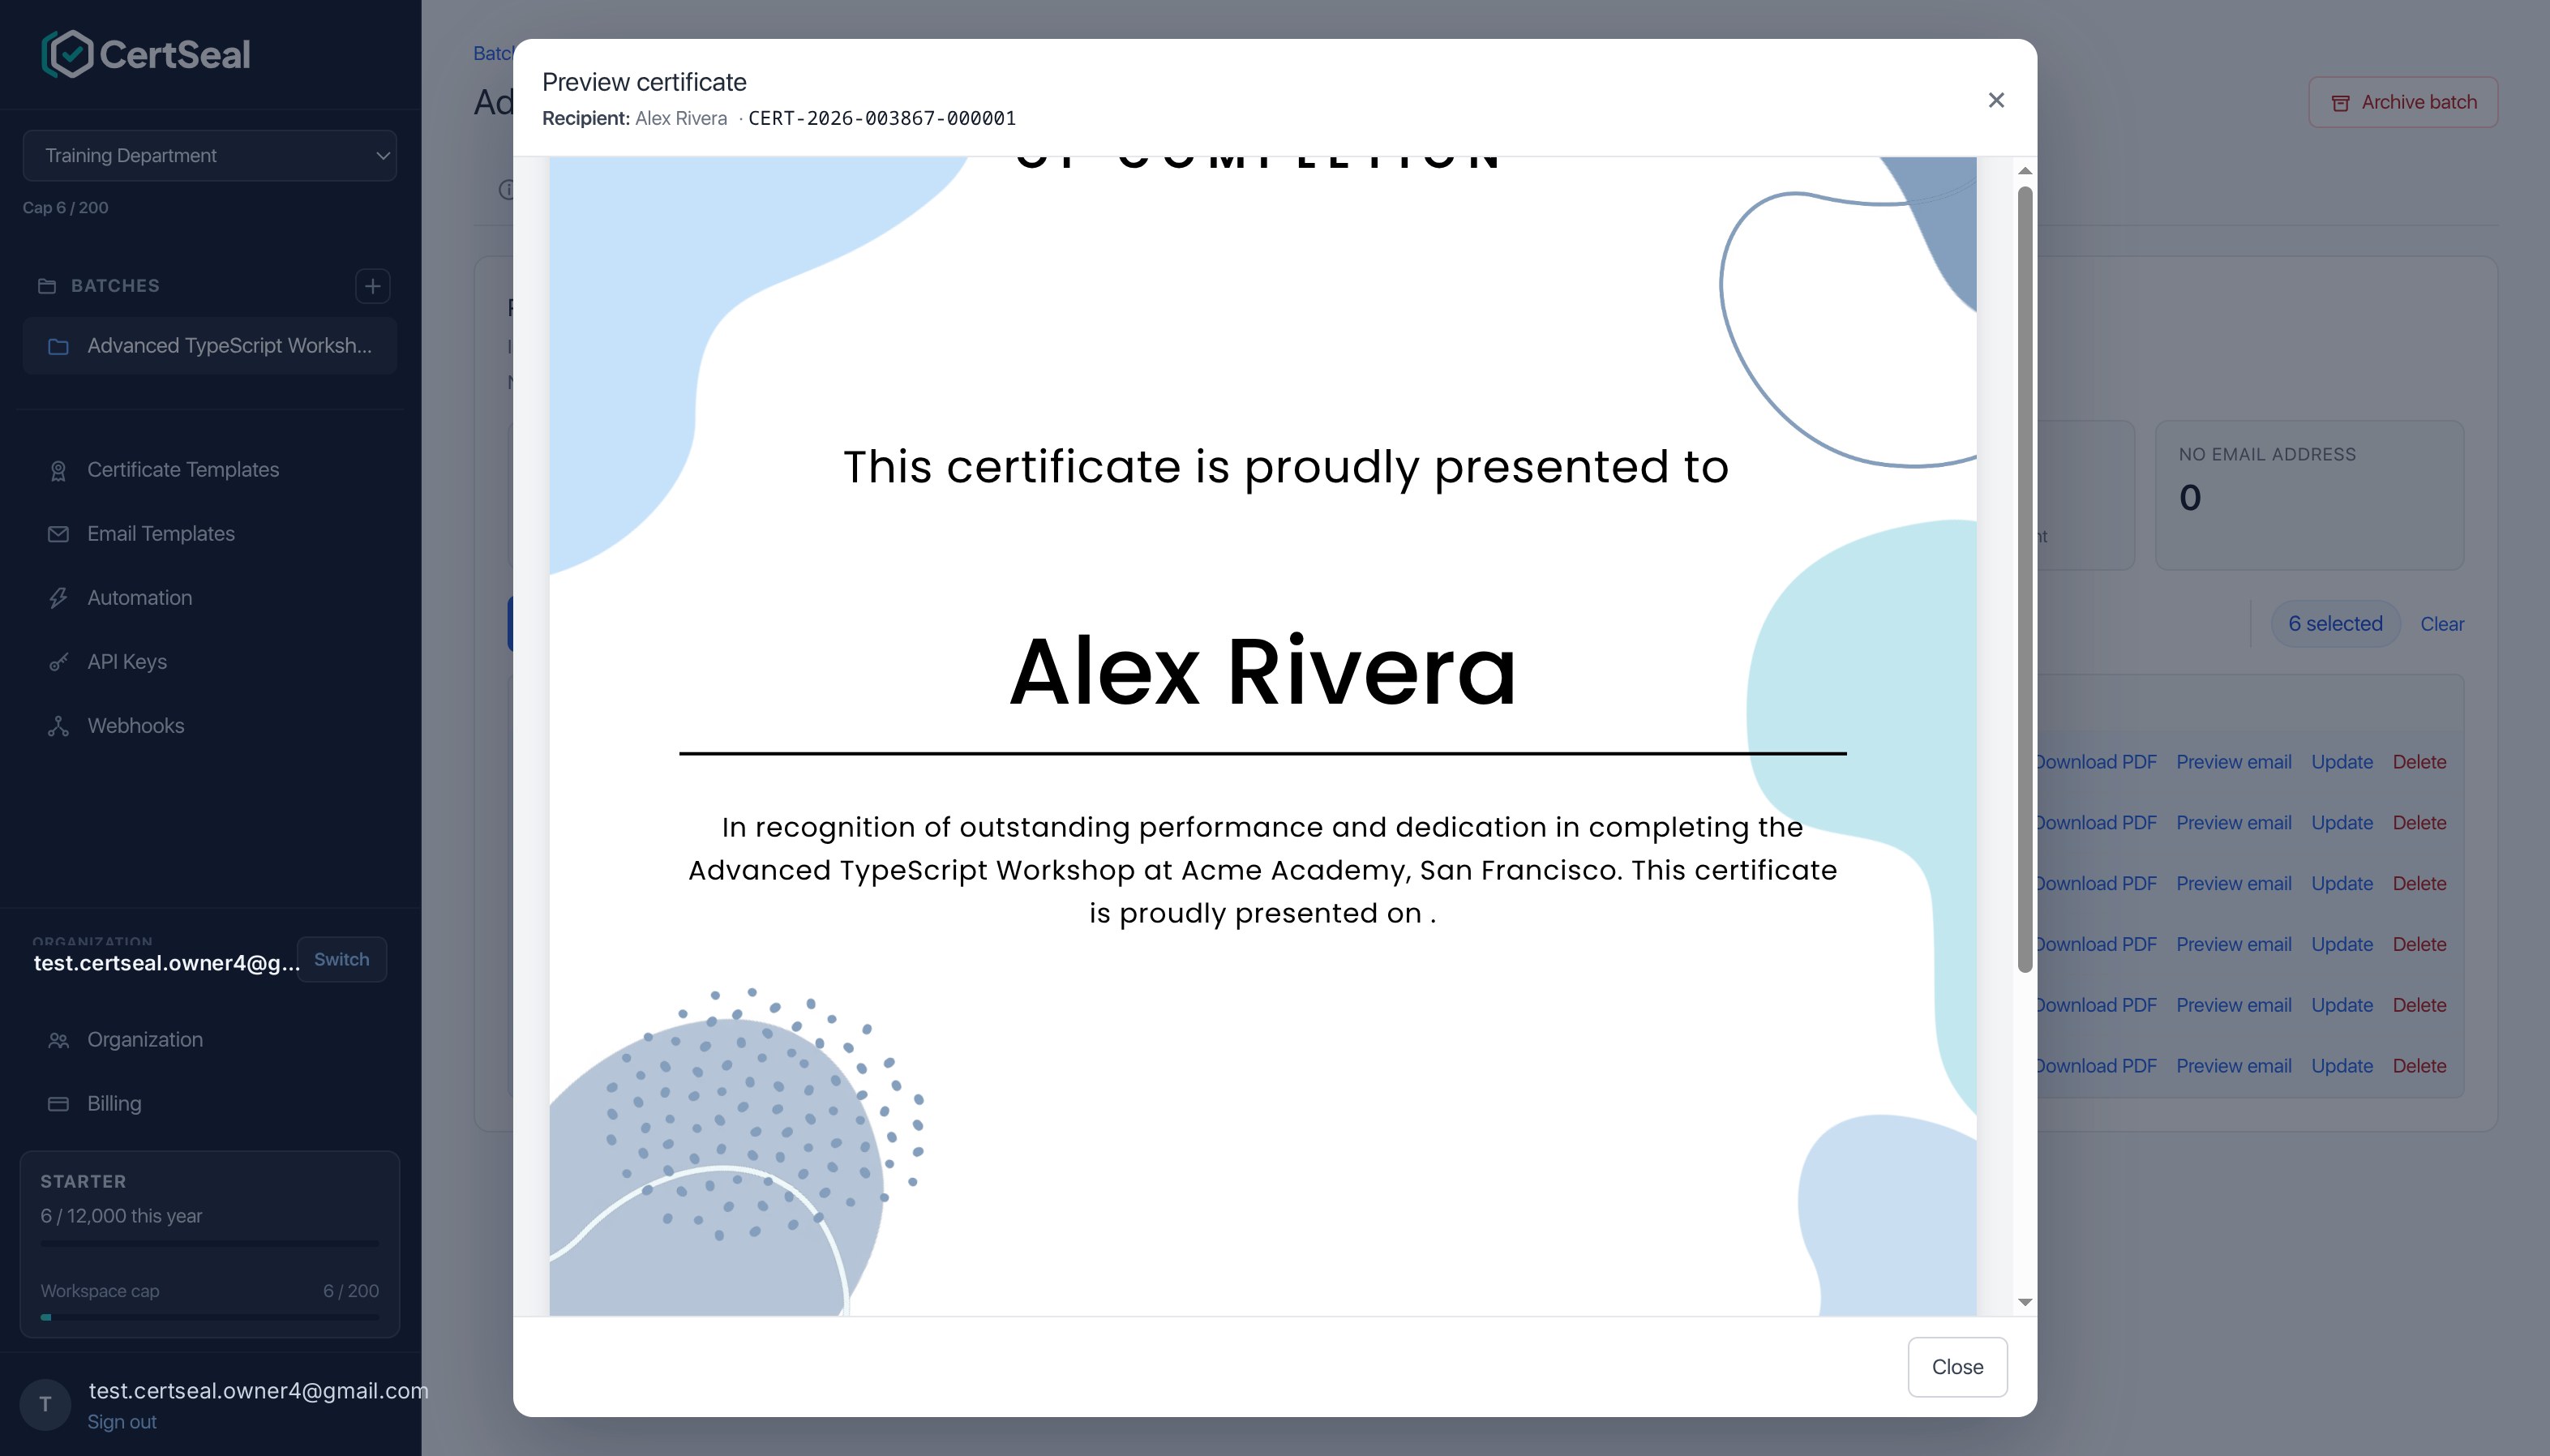
Use Preview cert on any row to see exactly what that recipient will receive, with their details merged into your design. Download PDF gives you the file directly, and Preview email shows the message that will accompany it.
Delivery statuses
The status column and the stat cards tell you where each certificate stands:
- Not queued — the certificate exists but no email has been sent yet.
- In queue — waiting to be sent or currently sending.
- Sent — the email was delivered to your provider for the recipient.
- Failed — delivery was rejected; you can fix the address and re-send.
Use Refresh to pull the latest statuses.
Archive a batch
Batches aren’t deleted — they’re archived. Click Archive batch to freeze it and hide it from your Active list; find it later under the Archived tab and unarchive if needed. Archiving keeps every certificate’s public verification link working forever, so links you’ve already shared never break.
Support
Questions about batches, imports, or sending? Email support@certseal.com and a real person will reply, typically within 1 business day (Monday–Friday, 9:00 AM–6:00 PM SGT). See the support guide for all contact options.